Call Richmond!

(804) 220-0440

Call Roanoke!

(540) 420-0402

Author: Andrew Grider

What Temperature Is Too Cold To Mow Grass? (Solved)

Ever wondered when it’s just too cold to fire up that mower? 

As the weather cools down, it’s a question that pops up for many of us.

It’s usually too cold to mow grass when the temperature drops below 40°F (4°C).

In this post, I’ll explain why anything below this temperature is too cold to mow grass and the risks of doing it. Plus, I’ll give you some signs to watch out for along with some tips.

When Is It Too Cold To Mow?

There’s no exact temperature that’s “too cold” for mowing, but you’ll want to put the brakes on mowing when the thermometer dips below 40°F (4°C).

Why? Well, a few reasons.

First, the grass gets a bit brittle in the cold, so it’s more likely to get damaged.  Also, you’ve got to watch out for frost – mowing frosty grass is a big no-no.

And don’t forget about moisture.

Also Read: Peat moss for bare spots in lawn 

Let me explain this in more detail next.

Risks Of Mowing In Cold Temperatures

Mowing when it’s too cold can cause some problems. Let me break them down:

#1 Damage To Grass Blades

Mowing when it’s too cold can be rough on your grass. 

Cold temperatures make grass blades stiffer and more brittle.

Instead of being cut cleanly by the mower blade, the grass is more likely to be torn or shredded.

This can leave rough edges on the grass, which doesn’t just look bad but also makes the grass more likely to get diseases or be attacked by pests.

The damaged blades might turn brown, making your lawn look unhealthy.

#2 Compacts The Soil

Mowing when it’s cold can also mess with your soil too. 

When the ground is cold, especially if it’s wet or partially frozen, it’s more likely to get squished down by the weight of the mower.

This compacted soil makes it harder for grass roots to grow, tougher for water and nutrients to reach the roots, and can lead to drainage problems. 

Plus these effects can stick around long after the cold weather is gone.

So it’s going to affect your lawn’s health throughout the growing season.

#3 Lowers Mower Performance

Cold weather doesn’t just affect your grass – it can also affect how well your lawn mower works.

Cold temperatures make engine oil thicker, which can make it harder for your mower to start and run well. This extra strain on the engine can cause more wear and tear, and shorten your mower’s life.

If you’ve got an electric mower, cold temperatures can affect the battery, making it run out faster and work less efficiently.

Also Read: Will lime kill new grass seed?

For gas-powered mowers, cold weather can mess with the fuel, potentially causing starting problems or making the engine run poorly.

Signs That It’s Too Cold To Mow

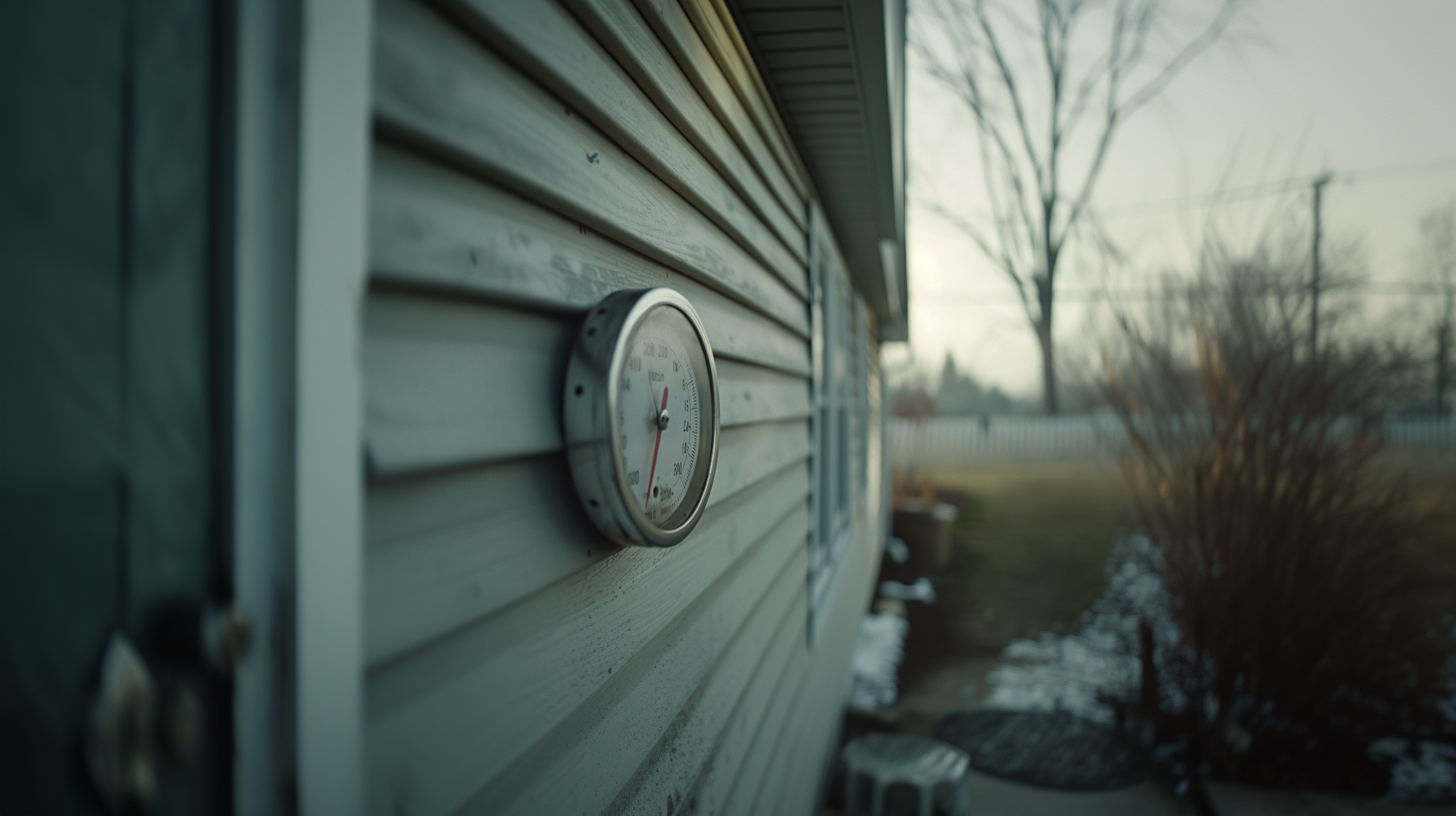
Thermometer Showing Cold Temperature On Side Of House

So how can you tell if it’s too cold for mowing, beyond just checking the thermometer?

Your lawn can actually give you some pretty clear hints. Here are some things to look out for:

Frost Or Ice On The Grass Blades

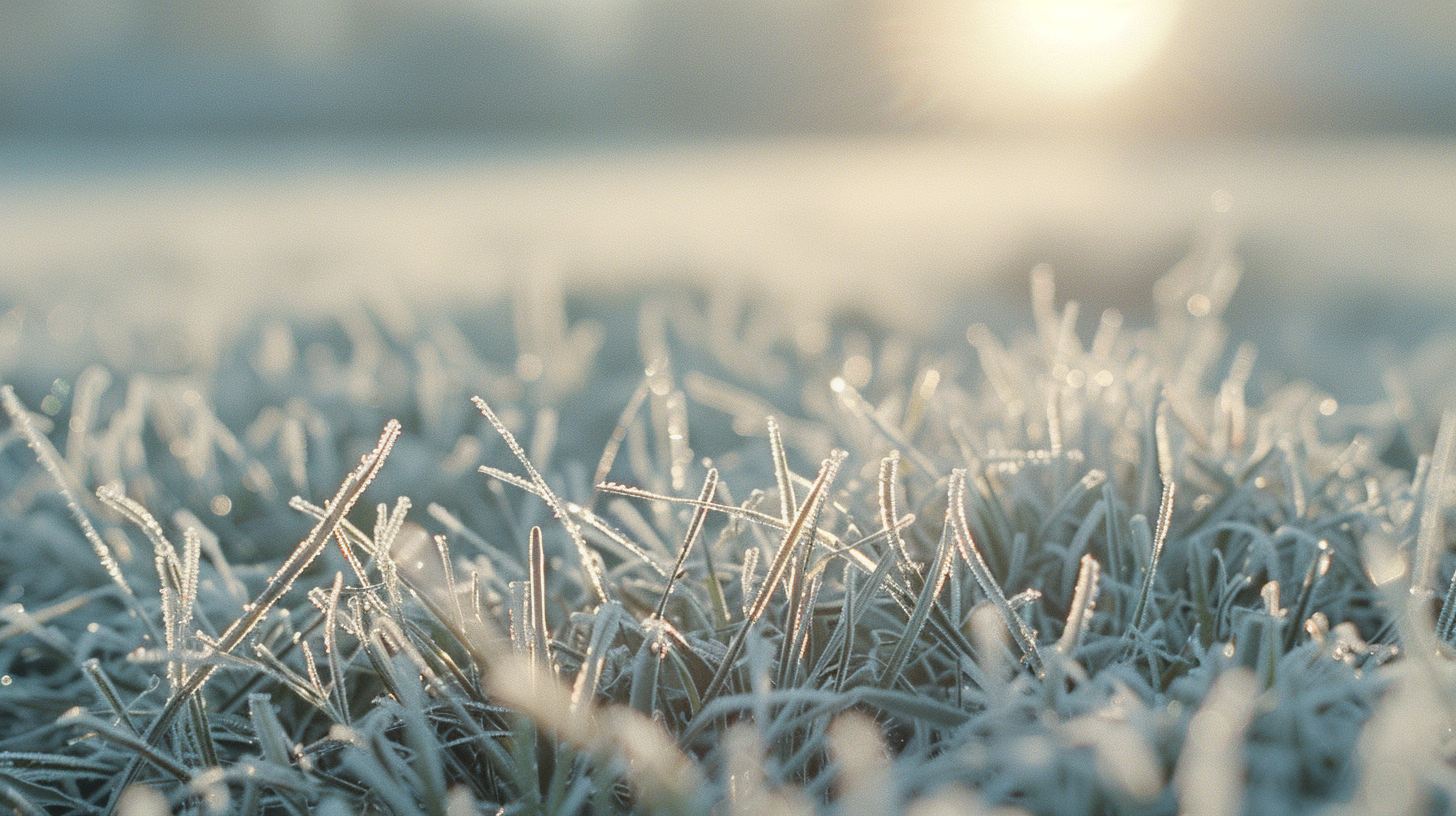
If you step outside and see your lawn sparkling with frost or ice, it’s definitely not mowing time. 

Those little ice crystals make the grass super fragile. Try mowing now, and you’ll end up with a lawn that looks like it’s been through the wringer. 

Even if the air feels kind of warm, frost can still show up on clear nights when the ground gets extra cold. 

Frozen Or Very Wet Soil

The ground beneath your feet can tell you a lot too. 

If the soil is frozen solid, that’s a big red flag for mowing. Trying to mow on frozen ground can tear up your lawn, mess up your mower, and hurt the grass roots. Not good! 

Likewise, if the soil is wet and squishy (which happens a lot in cold weather), it’s best to wait. 

Mowing on really wet soil can compact it too, which isn’t great for your grass.

A good test: if you can see your footprints in the lawn long after you’ve walked on it, or if there are puddles hanging around, it’s too wet to mow.

Tips For Mowing In Cooler Weather

Here are some of my best tips for mowing in cold temperatures:

Wait For Frost To Melt

One of the most important things to remember when mowing in cooler weather is to always wait for any frost to melt completely before you start mowing.

Grass covered in frost is very easy to damage like I explained.

So wait until the sun has fully melted the frost and the grass returns to normal.

Also Read: granular or liquid fertilizer

Let The Grass Grow More

As it gets colder, it’s usually a good idea to let your grass grow a bit longer.

Longer grass blades help protect the base of the grass plant, which is important for it to survive during colder months.

A good rule to follow is to never cut off more than one-third of the grass blade length in one mowing session. In cooler weather, you might want to cut even less than that.

This approach helps reduce stress on the grass and allows it to keep more of its energy, which is important for surviving winter and recovering in spring.

Best Time Of Day To Mow In Cold Weather

Grass Warming In The Sun

If you have to mow in cooler weather, do it in the late morning or early afternoon when temperatures are at their highest for the day.

This makes sure that any morning dew or frost has had time to evaporate.

And it reduces the risk of fungal diseases and makes for a cleaner cut.

Plus, mowing at this time gives the grass several hours of daylight to recover before night comes and temperatures drop again.

And try to avoid mowing early in the morning or late in the evening when temperatures are at their lowest and there’s usually more moisture.

Bottom Line

So there you have it – the lowdown on mowing in cold weather.

While 40°F is generally the cut-off point, remember to look out for other signs like frost, wet grass, or frozen ground.

Follow all the tips I’ve talked about and you can keep your lawn healthy all year round!

FAQs

Can You Mow Lawn After Frost?

No, it’s best to wait until the frost has completely melted and the ground thaws a bit. Mowing frozen grass blades can damage them.

Is It Better To Leave Your Lawn Long Or Short For Winter?

It’s better to leave your lawn a bit long for winter, ideally between 2 and 2.5 inches tall.

Using Peat Moss For Bare Spots In Lawn? (Go For It!)

Do you have those annoying bare spots in your lawn? You know the ones – they pop up here and there, making your grass look a bit patchy?

It’s a common problem that many of us face, and it can be pretty frustrating.

These bare patches don’t just look bad; they also invite weeds to move in and can lead to soil washing away.

But don’t worry! There’s a natural fix that more and more gardeners are turning to: peat moss.

This stuff is pretty amazing for bringing those bare spots back to life!

In this post, I’ll go over everything about using peat moss for bare spots in lawn.

Can I Use Peat Moss For Bare Spots In Lawn?

Yes you can! Peat moss is great for fixing up those bare spots. It’s not just a quick cover-up; it actually helps create the perfect conditions for new grass to grow. 

Peat moss has a bunch of qualities that make it really good for this job. 

It helps seeds sprout, makes your soil better, and even protects the new grass as it grows. 

That’s why so many gardeners reach for peat moss when they need to fix bare spots.

Also Read: Liquid or Granular Fertilizer

Let me explain some if its qualities in more detail:

Moisture Retention

One of the coolest things about peat moss is how it holds onto water. This is super important when you’re trying to grow new grass in bare spots. 

Peat moss soaks up a lot of water and then slowly lets it out to the soil and seeds around it. 

This means your new seeds will have water when they need it, even if it doesn’t rain for a while. 

You won’t need to water as often, and your seeds will have all the moisture they need to sprout and grow into healthy grass.

Improves Soil Structure

Peat moss does more than just hold water; it actually makes your soil better overall. 

When you mix peat moss into the bare spots of your lawn, it helps loosen up packed-down soil and improves how it’s structured. 

This better structure lets air and water move through the soil more easily. 

As a result, grass roots can grow better and deeper, getting more nutrients and water. 

This leads to stronger, healthier grass that can better handle things like dry spells or people walking on it.

Improves Seed Contact

When you’re trying to grow new grass in bare spots, it’s really important for the seeds to touch the soil well. 

Peat moss is great for this because it creates a perfect little bed for the seeds. 

When you spread peat moss over your newly planted seeds, it forms a light layer that helps the seeds nestle right up against the soil underneath. 

This close contact is key for the seeds to sprout because it lets them get the moisture and nutrients they need to start growing.

Seed Protection

Another great thing about using peat moss on bare spots is how it protects your grass seeds. 

When you put a light layer of peat moss over your newly planted seeds, you’re basically giving them a protective blanket. 

Also Read: Pet Friendly Ground Coverings for Your Yard

This keeps the seeds in place, so they don’t get washed away by rain or blown away by wind. 

It also helps keep the temperature and moisture around the seeds just right, making a stable environment for them to sprout.

This protection gives your grass seeds the best chance to take root and grow into healthy plants.

How To Use Peat Moss For Bare Spots

Now that you know peat moss is great for bare spots in lawn, lets see how to use it:

#1 Prepare the Area

First things first, you need to get the area ready. 

Start by clearing out any junk, dead grass, or weeds from the bare spot. Use a rake to get all this stuff out and to lightly scratch up the surface of the soil. 

This scratching helps loosen up packed-down soil and makes a better place for seeds to sprout. 

Take your time with this step – good prep work sets you up for success. 

Try to loosen up about half an inch of soil across the whole bare area.

#2 Seed Application

Once you’ve got the area prepped, it’s time to plant your grass seeds. 

Pick a type of grass seed that matches the rest of your lawn and grows well in your area. Spread the seeds evenly over the area you’ve prepared. 

You want good coverage, but don’t go overboard.

 Too many seeds fighting for space can lead to weak grass.

Use a seed spreader or just your hand for smaller areas, making sure to spread the seeds evenly across the whole bare spot.

#3 Add Peat Moss

Now for the key step: adding the peat moss. 

Spread a thin, even layer of peat moss over the area where you just planted the seeds. 

You don’t need a thick layer – about a quarter to half an inch is plenty. This thin layer is enough to hold moisture and protect the seeds without smothering them. 

Gently rake the peat moss to spread it evenly and help it settle a bit into the soil.

#4 Watering

The last step is watering. 

Give your newly seeded and peat moss-covered area a good, gentle watering. You want to wet the peat moss and the soil underneath without washing away the seeds. 

Use a sprayer with a fine mist or a sprinkler on its gentlest setting. 

Keep the area consistently moist (but not soaking wet) for the next few weeks. You might need to water lightly once or twice a day, depending on how hot and dry it is where you live. 

Keeping things consistently moist is key to getting the seeds to sprout and the grass to start growing well.

Things To Keep In Mind When Using Peat Moss

Now there are some things you need to know about using peat moss:

Acidity

It’s good to know that peat moss is naturally a bit acidic. This isn’t usually a problem, but it can change how acidic your soil is.

Some types of grass like slightly acidic soil, while others prefer it more neutral. 

If you’re worried about the acidity, you might want to test your soil before adding peat moss. 

If your soil is already on the acidic side, you could add some lime to balance it out. Or, you could mix the peat moss with some compost to help make it less acidic.

It Can Dry Out

While peat moss is great at holding onto moisture, it can dry out in certain conditions, especially when it’s hot and sunny. 

When peat moss gets completely dry, it can form a hard crust on top that’s tough for water to get through. This can stop moisture from reaching your grass seeds and young plants.

Also Read: Plants That Grow Great in Sandy Soil

To prevent this, keep a close eye on your newly seeded area, especially when it’s warm or windy. 

Water as needed to keep the peat moss consistently moist until your grass is growing well.

Nutrient Content

Peat moss is great for improving how your soil holds water and how it’s structured, but it doesn’t provide much in the way of nutrients for your grass. 

It doesn’t give them the essential nutrients they need to grow strong and healthy. 

To fix this, you might want to mix a balanced, slow-release fertilizer into your peat moss before you spread it on the bare spots.

Or, you could plan to fertilize the seeded area once the grass has sprouted and started to grow. 

This will make sure your new grass has all the nutrients it needs to grow thick and healthy.

Pet Friendly Ground Coverings for Your Yard

Choosing pet-friendly ground coverings for your yard is simpler than you might think. Not only can aesthetic options like pebbles, mulch, or artificial turf add visual appeal, they’re often safer bets for your furry pals. Ponder clover for a beautiful, green carpet that’s easy to maintain and acts as a natural pest control. Artificial grass, while initially more expensive, is cost-effective in the long run. If seeking durable options, try creeping thyme or pet-friendly types of mulch and stones. Whichever you opt for, it’s crucial to take your pet’s behavior into account as well. Interested in more detailed insight? Let’s delve deeper.

Key Takeaways

  • Clover is a pet-safe, easy-to-maintain, and drought-resistant ground covering.
  • Artificial grass is a durable and eco-friendly option that saves time and money in the long run.
  • Creeping Thyme is a hardy plant that adds color and tolerates heavy foot and paw traffic.
  • Pet-friendly mulch options like cedar or pine and carefully selected stones can be used safely.
  • Consider the comfort, safety, and behavioral habits of your pets when choosing ground coverings.

Understanding Pet-Friendly Ground Coverings

Before you can choose the right ground covering for your yard, it’s essential to understand what makes a ground covering pet-friendly. You need to take into account factors such as grass alternatives, non-toxic plants, potty training, easy maintenance, and safe play areas when making your decision.

Grass alternatives like pebbles, mulch, or artificial turf aren’t only pet-friendly, but they also create a unique, aesthetic appeal to your yard. Non-toxic plants are important because, as you know, pets can often be tempted to nibble or play around plants. You want to make sure that all plants in your yard are safe for your furry friends.

When it comes to potty training, some ground coverings can make this task easier. For instance, certain types of mulch can discourage pets from using the area as a bathroom, thereby making maintenance easier.

Speaking of maintenance, easy-to-clean ground coverings are a plus. You want to spend more time enjoying your yard with your pet, not cleaning it.

Lastly, creating safe play areas is necessary. Ground coverings should be comfortable for your pet to run and play on. Comfortable, safe, and easy-to-maintain ground coverings help create a yard where you and your pet feel a sense of belonging.

Benefits of Clover for Pet Owners

Now, let’s consider clover, a ground covering that checks many of the boxes for pet-friendly yards. Clover benefits are numerous, providing a lush, green carpet that’s not just pleasing to the eye, but also easy on your pet’s paws. It’s safe for pets, even if they have a habit of nibbling on your lawn.

One of the key Clover benefits is its easy maintenance. Unlike traditional grass, clover doesn’t require frequent mowing or fertilizing, leaving you more time to play fetch with Fido. It’s also drought resistant, thriving in hot summers when other plants might wither, ensuring your pet always has a soft space to roam.

Furthermore, clover serves as a natural pest control. It discourages harmful bugs, including ticks and fleas, which can pose serious health risks to your pets. This means less reliance on chemical pesticides, creating a healthier environment for your furry friends.

In short, clover is a ground cover that not only creates a beautiful, green yard, but also makes it a safer, more enjoyable place for your pets. It’s a win-win situation for you and your four-legged family members.

Exploring Artificial Grass Options

Switching to synthetic grass might seem like a drastic move, but it’s a pet-friendly option that offers a host of benefits for your yard. You’ll be part of a community that values both practicality and aesthetics, without compromising the well-being of your beloved pets.

In terms of maintenance, synthetic grass demands fewer resources. There’s no need for watering, mowing, or fertilizing. It stays beautifully green all year long, saving you both time and money on upkeep.

When looking at cost comparison, the initial investment in synthetic grass is higher than natural grass. But, over time, you’ll recoup this through lower maintenance costs. Plus, its longevity makes it a cost-effective choice in the long run.

The installation process of synthetic grass is straightforward. A team of professionals will ensure it’s installed correctly for best function and appearance. Durability testing has shown that high-quality synthetic grass can withstand heavy foot and paw traffic, ensuring it lasts for years.

Lastly, if you’re conscious about the environment, there are eco-friendly options available. Many brands use recycled materials to make their synthetic grass, contributing to a greener and more sustainable world. This makes it not just a pet-friendly, but also an earth-friendly choice.

Creeping Thyme: A Hardy Alternative

Another pet-friendly ground cover you might consider is creeping thyme, a hardy plant that not only adds a splash of color to your yard but also withstands heavy foot and paw traffic. This low-lying perennial, with its tiny aromatic leaves and purple flowers, adds significant aesthetic appeal to any garden.

When planting creeping thyme, consider these tips:

  • Choose a sunny spot with well-drained soil.
  • Space young plants 8-12 inches apart to allow for growth.
  • Water regularly until established, then only during prolonged dry periods.
  • To encourage dense growth, lightly trim after flowering.

Maintenance requirements are minimal. Creeping thyme is drought-resistant, needing water only during severe dry spells.

Climate-wise, it thrives in USDA zones 4-9. If you’re in a colder region, consider planting in a raised bed or container, which can be moved indoors in harsh winters.

Creeping thyme is generally free from common garden pests and diseases. However, watch for root rot in overly wet conditions.

Using Mulch and Stone Safely

For pet owners looking for non-plant options for ground coverage, mulch and stone can be safe and visually appealing alternatives when used correctly. Mulch safety involves selecting pet-friendly options, like cedar or pine, that discourage pests and improve soil health. Avoid cocoa mulch, as it can be harmful to dogs.

You should also consider your pet’s behaviors. Do they dig or chew? If so, large, rough-edged stones may not be the optimal choice. Smooth pebbles or river rocks can offer a secure, cozy surface for play and rest.

Stone precautions include staying away from sharp or jagged choices that could harm your pet’s paws. Also, keep in mind that dark-colored stones can become quite warm under the sun and may be unpleasant for your pet.

Lastly, think about yard maintenance. Mulch will need to be replaced periodically to guarantee it remains effective and safe. Stones, on the other hand, require less frequent attention but should still be inspected for sharp edges and debris.

Conclusion

As a pet owner, you’ve got a host of pet-friendly ground cover options to choose from. Whether you opt for the natural charm of clover, the durability of artificial grass, or the hardiness of creeping thyme, each offers unique benefits.

And don’t forget about mulch and stone, which can also be used safely.

So, go ahead, revamp your yard with these pet-friendly materials, and create a haven that your furry friends will love to explore.


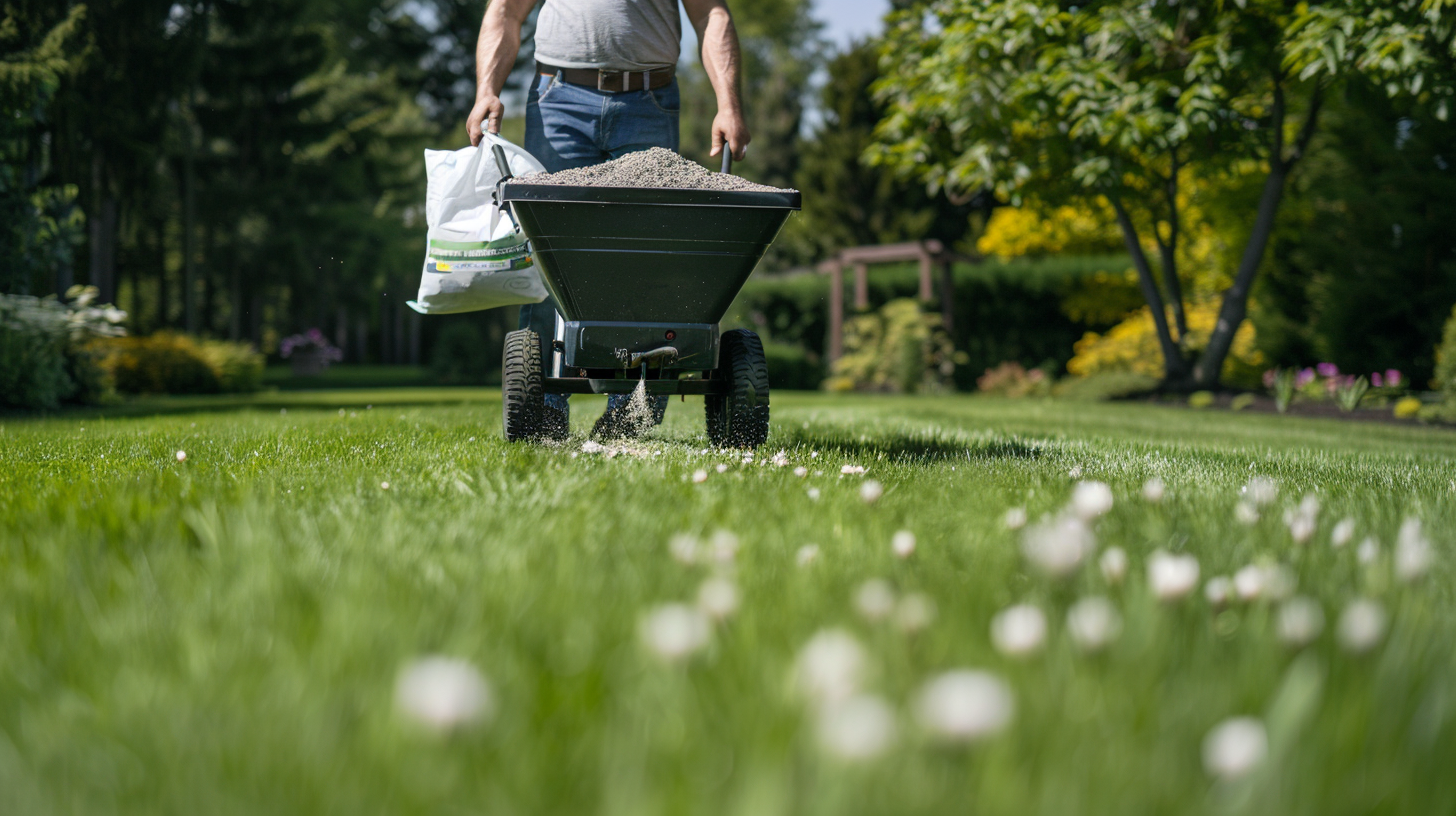
Liquid or Granular Fertilizer – What’s the Best Option for Your Lawn?

When choosing between liquid and granular fertilizers for your lawn, consider this: both contain essential nutrients, but differ in application and effectiveness. Liquid fertilizers provide immediate absorption and quick results, ideal for instant greening and growth. Granular fertilizers slowly release nutrients over time, supporting consistent growth, especially for larger lawns. While liquid fertilizers can be pricey initially, they’re cost-effective for small lawns. Granular fertilizers could be more economical for large lawns long term. Considering these factors will guide you to the right choice. Keep going, there’s much more to discover about lawn care tactics.

Key Takeaways

  • Liquid fertilizers provide quick nutrient absorption and uniform coverage, making them suitable for immediate results and smaller lawns.
  • Granular fertilizers offer a slow-release, long-lasting nutrient supply, ideal for larger lawns and established growth patterns.
  • The cost-effectiveness of liquid versus granular fertilizers varies, with liquid being pricier per application but potentially economical for small lawns.
  • The nutrient absorption efficiency of liquid fertilizers is higher, providing immediate benefits, while granular fertilizers support sustained growth over time.
  • Storage and application convenience differ, with liquid fertilizers requiring careful storage and easier application, while granular types may require specific spreading equipment.

Understanding Fertilizer Composition

To understand the differences between liquid and granular fertilizers, one must first grasp their composition – both types contain necessary nutrients such as nitrogen, phosphorus, potassium, and various micronutrients. The key difference lies in their physical form and the way plants absorb these nutrients.

When comparing granular vs liquid fertilizer, you’ll find that the nutrient absorption process differs. Liquid fertilizer composition allows rapid absorption into the soil and plant roots, providing quick results. Conversely, granular fertilizers are slow-release products, gradually providing nutrients to your plants.

Application efficiency also varies between these fertilizers. Liquid fertilizers, easily mixed with water, offer uniform coverage, ensuring all your plants receive the required nutrition. Granular fertilizers, however, require careful application to avoid clumping and uneven nutrient spread.

Lastly, consider the cost and environmental impact. Liquid fertilizers can be cost-effective for small lawn areas, but for larger lawns, granular fertilizers may be more economical due to less frequent applications. In relation to environmental impact, liquid fertilizers have a lower risk of runoff, making them a more eco-friendly choice. Understanding these factors will help you choose the right fertilizer for your garden’s needs.

Application Methods: Liquid Vs Granular

Exploring the application methods of liquid and granular fertilizers can greatly influence the overall health and growth of your lawn. Liquid fertilizer vs granular, which one’s application method is more effective? It depends on your lawn’s needs.

Liquid fertilizers are typically applied using sprayers, ensuring even and immediate distribution of nutrients. This method is ideal for lawns that require quick results, as it allows for faster nutrient absorption. You can also use liquid fertilizers in combination with other lawn care products, making it a versatile choice. So, if you’re looking at liquid vs granular fertilizer for vegetables or other plants that need immediate nourishment, liquid could be your best bet.

On the other hand, granular fertilizers are spread using broadcast or drop spreaders. This method requires careful attention to avoid over-application or uneven coverage. However, it’s an excellent choice for larger lawns or those with established growth patterns. Granular fertilizer vs liquid often means a slower release of nutrients, providing a sustained feed for your lawn over time.

Choosing between spray fertilizer vs granular involves understanding these application methods and aligning them with your lawn care goals. Remember, the right application can make all the difference in your lawn’s health and appearance.

Benefits of Liquid Fertilizers

When it comes to nourishing your lawn quickly and effectively, liquid fertilizers offer several advantages that can make a substantial difference.

One of the primary liquid fertilizer benefits is the speedy absorption rate. Unlike granular fertilizers, which take time to dissolve and penetrate the soil, liquid fertilizers are readily available for your lawn’s immediate nutrient needs. This results in faster greening and growth, vital for lawns that need a quick boost.

The advantages of liquid fertilizer also include ease of application. You can easily mix these fertilizers with water and apply them using a sprayer. This method ensures even distribution, providing consistent coverage and nutrient absorption across your lawn.

Furthermore, the benefits of using liquid fertilizer extend to its blendability. It’s compatible with other lawn care products, allowing you to treat multiple lawn issues in one go. This is a time-saving advantage that can notably enhance your lawn care routine.

Advantages of Granular Fertilizers

While liquid fertilizers have their merits, you shouldn’t overlook the significant benefits that granular fertilizers bring to your lawn care regimen. A common question is, ‘Is granular fertilizer better than liquid?’ The answer lies in understanding the advantages of granular fertilizers.

One of the key benefits of granular fertilizers is their slow-release formula. Unlike their liquid counterparts that provide immediate results, granular fertilizers release their nutrients slowly over time. This slow-release property guarantees a consistent supply of nutrients, promoting uniform growth and greening of your lawn throughout the season.

Granular fertilizers are also more cost-effective, especially for larger lawns. They require fewer applications, saving you both time and money. Plus, when bought in bulk, granular fertilizers have a longer shelf life, offering an economical advantage over liquid fertilizers.

In addition, granular fertilizers are easier to handle and apply, reducing the risk of overapplication. Moreover, their more tangible nature allows for targeted application, ensuring that your lawn gets the right amount of nutrients where it needs them the most.

Consequently, granular fertilizers not only nurture your lawn but also foster a sense of belonging in your gardening journey.

Comparing Liquid and Granular Fertilizers

Having examined the benefits of granular fertilizers, let’s now compare them with liquid fertilizers to better understand which one might be the best choice for your specific lawn care needs.

When considering liquid vs granular fertilizer, it’s important to understand the unique advantages each one offers.

Liquid fertilizer benefits include quick absorption for instant greening and growth, making it ideal if you’re looking for immediate results. It also offers easier application and mixability with other lawn care products. Not to mention, its application efficiency guarantees you get consistent coverage every time.

On the other hand, granular fertilizer benefits lie in its long-lasting impact due to slow-release formulations. They’re also cost-effective, requiring fewer applications, and offer consistent growth over a longer period. Plus, if you buy in bulk, they’ve a longer shelf life.

While choosing between liquid and granular fertilizers, also consider the environmental impact. Liquid fertilizers have a lower risk of runoff, reducing nutrient pollution in nearby water bodies. Granular fertilizers, however, require careful application to avoid nutrient runoff during rain.

Your choice between liquid and granular fertilizers ultimately depends on your lawn’s specific needs, your budget, and your environmental awareness.

Nutrient Absorption Efficiency

To enhance the health and beauty of your lawn, understanding the nutrient absorption efficiency of both liquid and granular fertilizers is crucial.

Liquid fertilizer absorption efficiency is generally higher due to the nutrients being in a readily available form. They’re swiftly taken in through the leaves and roots, offering instant benefits. The effectiveness of liquid fertilizer also stems from its even application, ensuring every part of your lawn receives equal nourishment.

On the other hand, the application efficiency of granular fertilizer relies on factors such as your lawn’s moisture levels and temperature. These fertilizers take longer to decompose, and their nutrients are released gradually. This slow release is advantageous for the consistent growth of your lawn over an extended period. However, the absorption rate of granular fertilizer may be lower if not applied and watered correctly, potentially resulting in an uneven distribution of nutrients.

When considering nutrient absorption, liquid versus granular, take into account these aspects:

  • Liquid fertilizers are rapidly absorbed, yielding immediate outcomes.
  • Granular fertilizers release nutrients slowly, supporting sustained growth.
  • Inefficient nutrient uptake may occur with uneven application of granular fertilizers.
  • Liquid fertilizers provide uniform coverage for effective nutrient distribution.

Choosing between the two depends on your lawn’s specific requirements and your preferred maintenance practices.

Cost and Environmental Impact

When it comes to the cost and environmental impact of liquid versus granular fertilizers, there are key distinctions that can influence your choice. You might find that the cost of liquid fertilizer vs granular can vary considerably.

Liquid fertilizers, due to their concentrated nature, are typically more expensive per application than granular options. However, if you’ve got a smaller lawn, liquid fertilizer may be more cost-effective than granular because you’ll use less product per application.

In a liquid vs granular cost comparison, you must also account for the frequency of application. Granular fertilizers often need fewer applications, which can make them more economical in the long run for larger lawns.

As for the environmental impact of liquid vs granular fertilizer, liquid fertilizers have a lower risk of nutrient runoff, a noteworthy concern for local waterways. Granular fertilizers, if not properly applied, can contribute to excessive nutrient runoff during rainfall, potentially harming the environment.

Storage Considerations for Fertilizers

When considering your fertilizer options, don’t overlook the significance of storage, as both liquid and granular fertilizers come with their own set of storage requirements. Proper storage of fertilizers is essential to maintain their effectiveness and to ensure safety.

When it comes to the storage of liquid fertilizer, you need to consider several factors:

  • Liquid fertilizers should be stored in a cool, dry place away from direct sunlight and in an upright position to prevent leaks.
  • Always keep them in their original containers with labels intact for future reference.
  • Never store liquid fertilizers near heat sources, as they may become unstable and potentially hazardous.
  • Make sure to secure the storage area to prevent access by children and pets.

On the other hand, granular fertilizer storage requires less strict conditions. However, some basic granular fertilizer storage tips include keeping them in a dry, well-ventilated area to prevent clumping and degradation. Moreover, as with liquid fertilizers, keep them away from children and pets.

To summarize, understanding and implementing proper storage practices for both liquid and granular fertilizers can make a significant difference in your lawn care journey.

Conclusion

So to sum it all up, both liquid and granular fertilizers have their own merits. Liquid fertilizers can provide rapid absorption and easy application, and granular varieties offer durability and cost efficiency. Your choice should take into account your lawn’s state, size, and desired outcomes.

Your lush, thriving lawn is within reach with the appropriate fertilizer!
 

Plants That Grow Great in Sandy Soil

Your sandy soil, with its excellent drainage and quick temperature regulation, can be ideal for specific plants. Truly, lavender, yarrow, rosemary, and sedum genuinely thrive in such an environment. Likewise, coneflowers, attract pollinators and are drought-tolerant, offering a low-maintenance addition to your garden. Boosting your soil’s fertility with organic matter and using slow-release fertilizers can enhance growth. This soil can be transformed into a productive garden with tailored approaches including strategic plant choices and soil improvement methods. As you venture further into this wealth of knowledge, you’re all set to turn your sandy soil’s challenges into real opportunities.

Our Key Takeaways

  • Plants like lavender, yarrow, rosemary, and sedum are highly adaptable to sandy soil conditions.
  • Coneflowers, being drought-tolerant and attracting pollinators, are an excellent choice for sandy soil.
  • Sandy soil provides excellent drainage and space for root development, ideal for less water-saturated plants.
  • Enhancing sandy soil with organic matter like compost or manure can support plant growth.
  • Drought-resistant plants like rosemary and lavender are ideal for sandy soil, requiring less frequent watering.

Understanding Sandy Soil

When exploring the domain of sandy soil, understanding its unique properties is essential. It readily crumbles into individual grains, has a light brown hue, feels grainy to the touch, and poses distinctive challenges because of the large size of its sand grains.

You’ll find that sandy soil, due to the vast spaces between its large particles, struggles to retain both water and nutrients. This is one of the inherent challenges of sandy soil, as it can impact the growth of plants.

However, not all is lost. With the right soil improvement techniques, you can turn these challenges into opportunities. By adding compost, peat moss, or manure, you can enhance the soil’s ability to retain essential nutrients and moisture.

Mulching is yet another effective technique, helping the soil moderate temperature, deter weeds, and as it breaks down, contribute organic matter to the soil.

Plant Selection for Sandy Soil

Having enriched your sandy soil with organic matter and proper watering techniques, you’re now ready to explore the variety of plants that will thrive in this environment.

You may wonder, ‘What plants grow in sand?’ or ‘What plants grow well in sandy soil?’. In your search for plants that grow in sand, you’ll find many wonderful options that are both beautiful and adapted to these unique soil conditions.

For instance, certain flowers that grow in sand, such as lavender and yarrow, are ideal, as they’re drought-resistant and love the excellent drainage that sandy soil provides.

In addition, rosemary, a culinary herb, and sedum, a succulent, are examples of plants that can grow in sand. They’re adept at surviving in the less nutrient-dense soil and can thrive with less frequent watering.

Moreover, you could also consider coneflowers, which aren’t only drought-tolerant but also attract pollinators to your garden. These plants that grow well in sandy soil are perfect for a low-maintenance and sustainable garden landscape.

Benefits of Sandy Soil

Despite its challenges, sandy soil offers certain advantages that can greatly benefit your garden. A major benefit of sandy soil is its excellent drainage which reduces the risk of waterlogging. This makes it an ideal environment for plants that grow well in sand, as they generally prefer less water saturation. Consequently, gardening in sandy soil can be quite rewarding if you choose the right plants for sandy soil.

Another advantage of sandy soil is its temperature regulation. It warms up quickly in the spring, giving your plants a head-start on growth. This can be particularly beneficial for early-blooming plants in sand, or for extending the growing season of certain vegetables.

Sandy soil also provides ample space for root development. This loose, well-aerated soil allows roots to penetrate deeply and spread widely. This not only anchors your plants firmly but also enables them to access more nutrients and water, leading to healthier, more robust growth.

Lastly, sandy soil is relatively easy to work with, being light and crumbly. This makes it easier for you to plant, transplant, and cultivate your garden. With the right choice of plants that grow well in sand, your sandy soil garden can be a thriving, verdant oasis.

Soil Improvement Techniques

To improve the productivity of your sandy soil garden, various soil enhancement techniques can be utilized, starting with the amendment of the soil. To amend sandy soil, incorporate organic matter such as compost, peat moss, or well-rotted manure. This action will enhance the soil’s capacity to retain both water and essential nutrients.

Subsequently, apply mulch to sandy soil. A layer of organic mulch, like straw or wood chips, can assist the soil in retaining moisture, regulating soil temperature, and suppressing weed growth. As the mulch breaks down, it will gradually add more organic material to the soil.

Because of its quick-draining quality, sandy soil necessitates frequent watering. However, keep in mind that deep watering is more advantageous than frequent shallow watering. This method promotes the development of deeper roots, rendering your plants more resilient to drought.

For fertilizing sandy soil, choose a slow-release fertilizer. Sandy soil lacks the capacity to retain nutrients, requiring regular fertilization.

Lastly, monitor soil moisture consistently using a moisture meter and closely observe your plants’ well-being. Adjust your watering and fertilization methods accordingly to maintain a flourishing garden.

Challenges of Sandy Soil

Tackling the challenges of sandy soil can feel like trekking through a desert, but understanding these obstacles can help you cultivate a thriving garden.

One of the primary sandy soil challenges is its low nutrient retention. The large, coarse particles have significant spaces between them, allowing water and nutrients to seep through quickly. This means your plants may not get the sustenance they need before it drains away.

Another challenge is that sandy soil dries out quickly. It’s thirsty soil that requires frequent watering to stay moist. But be cautious, watering sandy soil too often can lead to another issue: soil erosion. The loose structure of sandy soil makes it prone to displacement by water and wind.

These challenges may seem overwhelming, but they’re not insurmountable. By understanding the nature of sandy soil, you’re one step closer to creating a garden that flourishes despite these obstacles.

Tips for Gardening in Sandy Soil

Exploring the sandy terrain of your garden need not be a challenging task; with the right techniques and approaches, you can turn your sandy soil into a plant paradise. Understanding the inherent characteristics of sandy soil is the first step in sandy soil gardening. Its light, grainy structure might pose some sandy soil challenges, but strategic plant selection for sandy soil can turn this around.

You’ll want to opt for drought-resistant and sand-loving plants such as rosemary, lavender, and yarrow. These plants aren’t only resilient but can add beautiful splashes of color to your garden landscape.

Improving sandy soil is essential to guarantee it retains more nutrients and water. You can enrich your sandy soil by incorporating organic matter like compost, peat moss, or manure. This will enhance the soil’s fertility and water-holding capacity, making it more hospitable for your plants.

Seek Professional Help

While you can certainly take steps on your own to improve your garden’s sandy soil, don’t hesitate to seek out expert assistance for a more thorough and all-encompassing approach. Expert teams, such as The Grounds Guys, are equipped with the necessary knowledge and tools to make your gardening endeavor a success.

These specialists can conduct detailed soil testing, which provides a comprehensive analysis of the nutrient content and pH level of your soil. This information is essential for understanding how best to amend your soil to create the ideal environment for your plants to thrive.

Furthermore, professional teams can advise on and apply suitable soil conditioners. Soil conditioners can significantly enhance the fertility of your sandy soil by improving its structure and increasing its ability to hold water and nutrients. These amendments can also help to regulate the soil’s pH level, making it more conducive for plant growth.