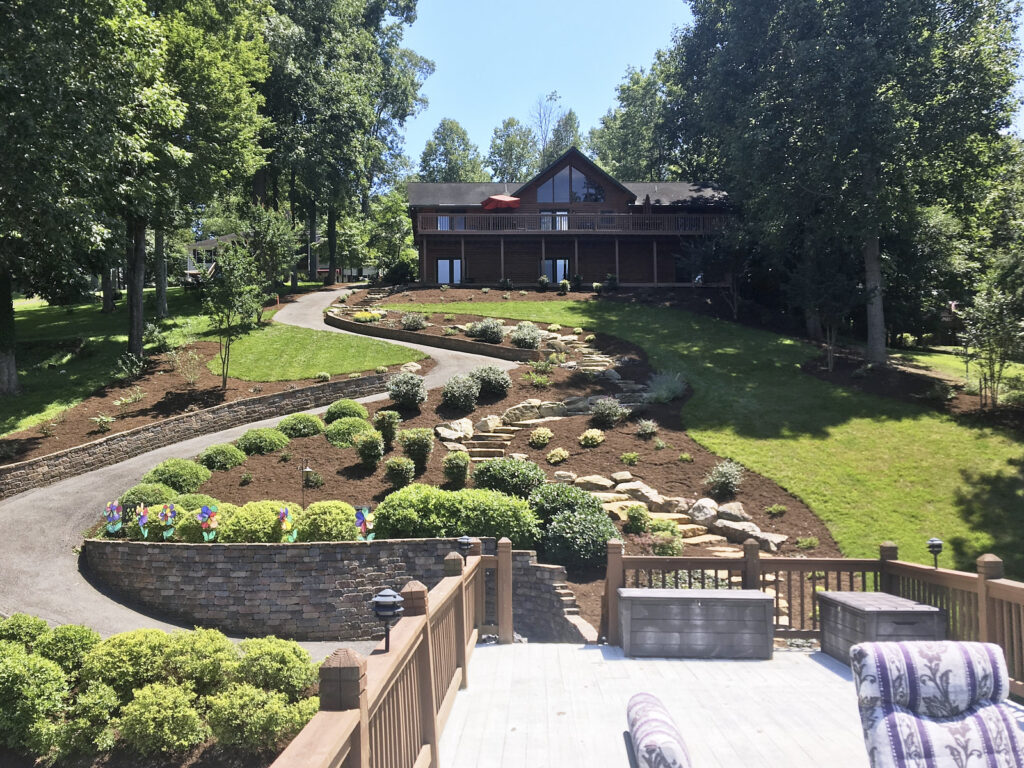
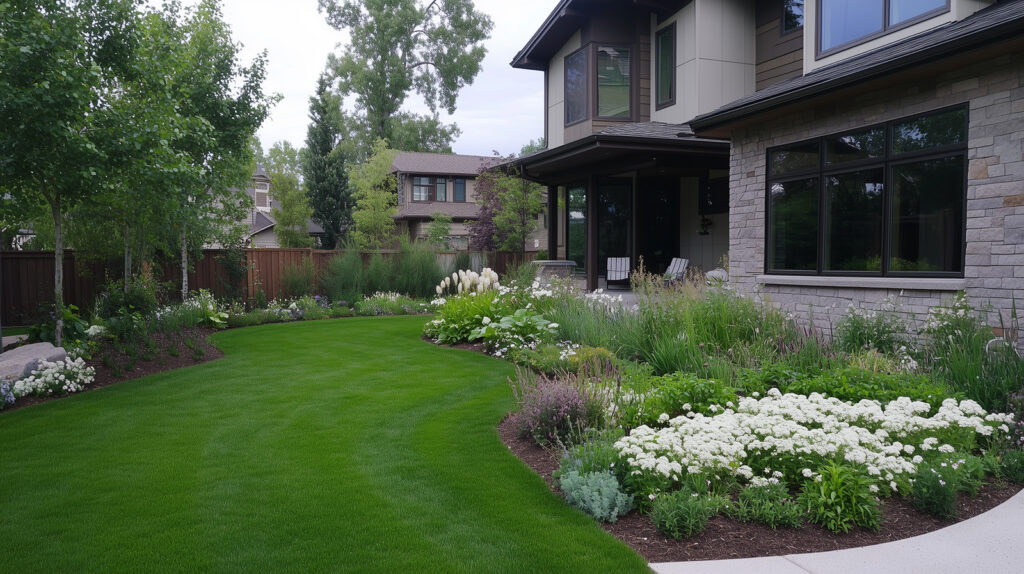
As the weather warms up in Powhatan, Virginia, now is the perfect time to give your outdoor space a complete refresh. A seasonal cleanup isn’t just about aesthetics—it’s also one of the best ways to maintain your home’s value and create an environment you’ll love spending time in. From lawn care to lighting, here’s your complete guide to reviving your yard this season.
Start with Lawn and Garden Maintenance
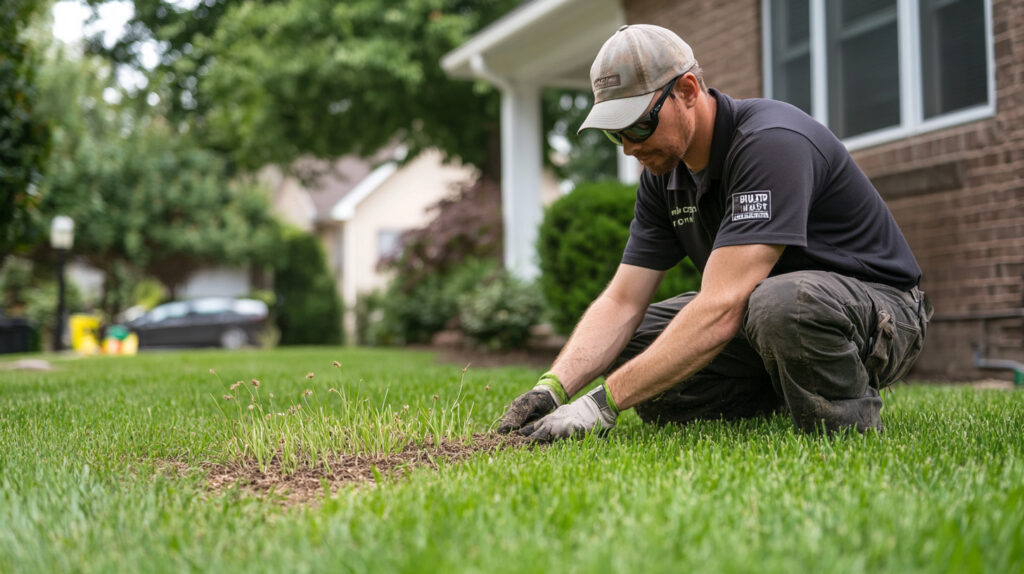
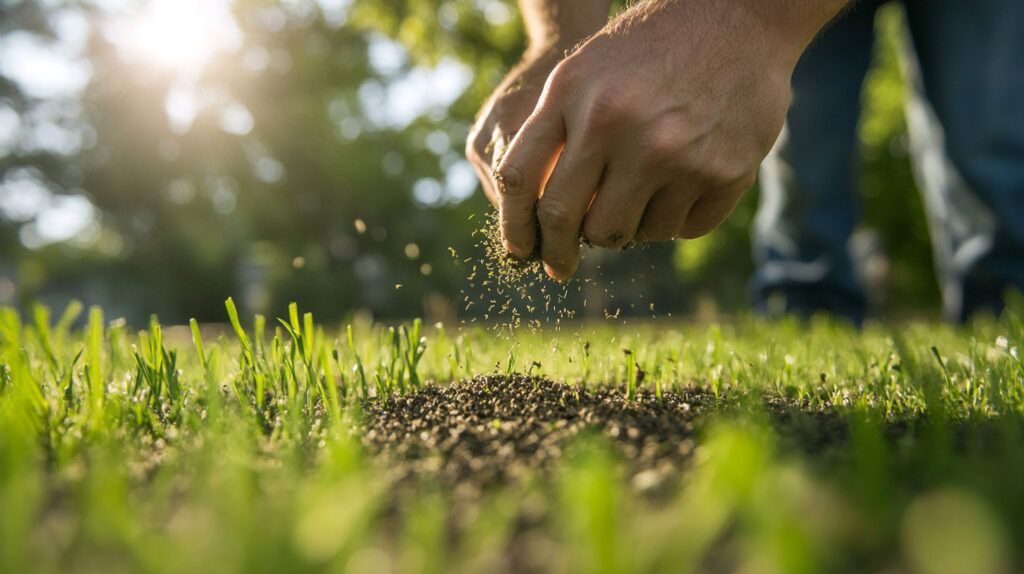
A clean, healthy lawn sets the tone for the rest of your property. Begin by mowing the grass, trimming overgrown hedges, and pruning dead or damaged tree limbs. These small steps can significantly boost your home’s curb appeal. Spring is also the ideal time to aerate your lawn and apply fertilizer, helping roots grow deeper and grass grow thicker.
Don’t forget your flower beds—removing old mulch and debris and replacing it with a fresh layer gives your garden a tidy, finished look. Cleanly edging the borders between lawn and beds can make a huge visual difference, adding structure and style to your landscape.
Refresh Patios, Walkways & Driveways with Pressure Washing
Hard surfaces like concrete, brick, and pavers tend to accumulate dirt, algae, and mildew over time, especially in the humid Virginia climate. That’s where pressure washing comes in. A professional cleaning can make your walkways, patio, and even your siding look brand new.
If you’re looking for expert power washing services in Powhatan, we highly recommend Zapp It Power Wash. Their team delivers high-quality, residential pressure washing that instantly brightens your outdoor space—no harsh chemicals, just spotless results.
Install or Update Landscape Lighting
Nothing elevates a yard like well-placed lighting. Landscape lighting not only adds beauty—it also increases safety and extends the usability of your outdoor space after sunset. Whether you want to highlight trees and architectural features or simply add path lights for visibility, working with a professional lighting company ensures the best results.
For high-quality, custom landscape lighting in the greater Richmond area, check out Dominion Lightworks. They specialize in elegant, energy-efficient designs that enhance your home’s nighttime appeal and boost security.
Add the Finishing Touches
Once your lawn, garden, hardscapes, and lighting are taken care of, think about the small details that pull it all together. Clean or replace outdoor furniture cushions, plant seasonal flowers in pots near entryways, and update your mailbox or house numbers for a fresh look.
If you’re hosting events or putting your home on the market, these finishing touches can make your property stand out and create a memorable first impression.
Wrapping It All Up
Refreshing your yard doesn’t have to be overwhelming. By breaking it into manageable steps—lawn care, garden prep, pressure washing, and lighting—you can completely transform your outdoor space in just a weekend or two. And by partnering with trusted local pros like Zapp It Power Wash and Dominion Lightworks, you ensure every detail is handled with care.
Whether you’re prepping for summer fun or simply want to enjoy your outdoor spaces more, these updates will help you create a yard that feels just as inviting as the inside of your home.
Landscaping isn’t just about shrubs and mulch anymore – today, it’s just as much about how your yard looks at night as it does during the day. And if you’re thinking about adding a finishing touch to your outdoor space, lighting is probably the most underrated upgrade you can make.
My go-to company for outdoor lighting installs is Dominion Lightworks. They specialize in elegant, energy-efficient landscape lighting that brings your yard to life after dark. If you’re in Virginia, definitely check them out.
In this post, we’ll dig into the real-world benefits of adding landscape lighting to your property—from security and safety to curb appeal and lifestyle. We’ll also walk through a few pro tips and practical considerations if you’re thinking about getting started with a lighting system of your own.
1. Why Lighting Deserves a Spot in Your Landscaping Plan
When people talk about landscaping, they usually mean grass, plants, borders, patios—basically the daytime view. But without lighting, your yard disappears once the sun goes down. All the time and money you put into it? Gone until morning.
Outdoor lighting changes that completely. It highlights your home’s best features, draws attention to design details, and lets you enjoy your space long after dark. A well-lit yard feels warmer, more welcoming, and more intentional. It tells people you care—not just about what your home looks like, but how it feels.
2. Boosting Safety Without Sacrificing Style
Pathway lights aren’t just for show. They help people avoid tripping hazards, define where walkways start and end, and make things easier to navigate for guests or delivery drivers. You can guide traffic away from delicate flowerbeds or garden edges, too.
Lighting also makes a big difference around steps, uneven surfaces, water features, and outdoor seating areas. If you’ve ever had someone twist an ankle in your yard during a cookout, you already know how valuable this is.
And no—safety lighting doesn’t mean you have to install floodlights that make your backyard feel like a parking lot. Subtle LED path lights, low-voltage step lighting, and small uplights can all work together to create visibility without killing the vibe.
3. Deterrent for Intruders and Animals
It’s not just people who appreciate a dark corner—so do raccoons, deer, foxes, and the occasional sketchy human. A well-lit yard naturally keeps uninvited guests at bay.
Most break-ins and trespassing incidents happen at night, and studies have shown that visible lighting around a home’s perimeter is enough to make intruders think twice. Timers and motion sensors can add even more security without leaving the lights on all night.
And if you’re dealing with wildlife eating your plants, landscape lighting can discourage animals from getting too close. It won’t fix everything, but it’s a solid part of a layered prevention strategy.
4. Curb Appeal That Actually Sticks Around
Lighting makes your home look more polished and put-together—especially from the street. Uplighting on trees, downlighting on your façade, and a few well-placed accent lights can take a regular house and make it look like it belongs in a magazine.
Unlike many landscaping upgrades, this one holds up year-round. Even if your flower beds are dormant or your grass isn’t looking great, lighting still adds character and depth to the space. It’s an investment that doesn’t fade with the seasons.
5. It Expands Your Usable Space
Lighting lets you get more use out of your property. Want to hang out on the patio or grill dinner after work? No problem. Hosting a get-together that goes past sunset? Your guests won’t be stumbling around in the dark.
Even if you’re just sitting out with a drink or walking the dog, ambient lighting makes the yard feel more inviting—and more like part of your home, not just the space outside it.
6. Types of Landscape Lighting to Consider
Pathway Lights: Line walkways and driveways for both looks and safety.
Downlights: Mounted higher to cast soft light over gardens or patios.
Accent/Spotlights: Aim at focal points—statues, fountains, signage.
Deck & Step Lights: Installed in stairs, railings, or deck edging.
Wall Wash Lights: Evenly light up large surfaces like fences or facades.
Low-voltage LED lighting is the go-to these days. It’s energy-efficient, long-lasting, and safe for residential setups. Most systems are expandable, so you can start small and build over time.
7. Installation: DIY or Hire a Pro?
If you’re handy and just want to add a few solar-powered path lights, go for it. But if you’re thinking about a permanent, hardwired system, it’s worth bringing in a professional.
Professionals know how to balance brightness, placement, angles, and coverage. They’ll help avoid common mistakes like blinding lights, harsh shadows, or fixtures that get in the way of mowing and maintenance.
Plus, a licensed installer can handle electrical connections and controllers, install transformer hubs properly, and set up timers or smart controls that sync with your schedule.
8. Tips to Get the Most Out of Your Lighting
Use warm white light (2700K–3000K) for a cozy, natural feel.
Space out your lights—you don’t need to light everything.
Hide fixtures behind plants, rocks, or landscape features when possible.
Angle your lights to avoid glare and wasted light.
Mix up the height—some low, some high for a layered look.
Think about shadows as well as what you’re lighting directly.
Landscape lighting is as much about mood and atmosphere as it is about visibility. Less is often more, and even a small lighting setup can make a big impact when done right.
9. What Does It Cost?
Pricing depends on how many fixtures you need, the type of system, and whether it’s installed professionally. A simple path lighting setup could run a few hundred dollars, while a fully custom system with smart controls and uplighting around your whole property could land in the low thousands.
That said, landscape lighting holds its value well. It improves curb appeal, makes your home stand out in listings, and increases perceived value for buyers if you ever decide to sell.
Final Thoughts
Good landscaping doesn’t end when the sun goes down. Landscape lighting extends the beauty, safety, and function of your yard into the evening hours, and it makes your property look finished and cared for—like someone actually lives there, not just owns it.
Whether you go big with a custom setup or just start with a few path lights, the impact is immediate. It’s one of the most practical upgrades you can make to your outdoor space.
If you’re serious about transforming your yard, don’t sleep on the power of lighting. And again, if you’re in Central Virginia, Dominion Lightworks is the company I trust to do it right.
Tree Roots in Pipes & the Danger of Root Intrustion
Most people expect to deal with things like dripping faucets or the occasional clog. But what a lot of homeowners don’t realize is that one of the biggest threats to their plumbing is actually growing right in their yard—tree roots.
Yep, roots from nearby trees and shrubs can work their way into underground pipes, especially if those pipes are older or already have tiny cracks. And once roots get inside, things can go south fast.
Why Roots Go After Pipes
Roots look for water. Sewer lines and drain pipes are full of moisture and nutrients, so even the smallest leak or vapor trail can draw them in. Clay, cast iron, and concrete pipes tend to develop small cracks as they age, which makes them even easier to break into.
PVC pipes are a bit better, but if a joint isn’t sealed just right or the soil has shifted, roots can still find a way.
How They Get In
Cracks from age or shifting soil
Loose or misaligned joints
Completely broken or collapsed sections
Open pipe ends or abandoned cleanouts
Once inside, roots keep growing. They can stretch along the pipe, clogging things up as they go. It usually starts small, and then one day your toilet won’t flush and it’s a whole mess.
Things You Might Notice
Toilets and sinks draining slow
Weird gurgling noises when water goes down
Backups, especially in the basement or lowest drain
Smells you can’t explain, kind of like sewage
Patches of grass in your yard that are way greener than the rest
Wet spots or even a little sinkhole near the foundation
What Happens If You Ignore It
Blockages are a big one. Roots trap hair, grease, and debris until nothing can get through. Then you get a full-on backup into your house. Not fun.
Roots also cause pipes to crack or collapse. Replacing a sewer line is not cheap, and if it’s under a driveway or sidewalk, expect to deal with that too.
Leaks can lead to mold, water damage, or even mess with your foundation. And if sewage backs up into the house, you’re looking at some nasty cleanup and possible health problems.
Oh, and don’t forget the water bill. A slow leak underground might not be obvious right away, but your bill will start creeping up.
How to Stop Roots Before They Start
1. Know What’s Underground
Before planting anything, find out where your sewer lines are. You can call 811 and they’ll mark everything for free. Trees like willows, maples, and poplars are the worst offenders, so keep them far from your plumbing. Pick smaller, slower-growing trees instead.
2. Get a Camera Inspection
If your house is more than 20 years old, or you’ve had weird plumbing issues before, it’s probably worth getting a plumber to run a camera down the line. They can spot roots early before they wreck everything.
3. Install a Root Barrier
It’s exactly what it sounds like. A metal or plastic sheet goes in the ground between your trees and your pipes. It keeps roots from getting too close. You can also try chemical barriers, which slow root growth near your lines.
4. Use a Foaming Root Killer
You can flush a foaming root treatment down the toilet once or twice a year. It’ll coat the inside of the pipe and stop roots from taking over. Not a miracle fix, but it helps.
5. Replace Old Pipes
Clay and cast iron are just asking for trouble. If you’ve already had root problems, upgrading to PVC or doing a trenchless pipe repair might be worth it. Less digging, less mess.
6. Be Smart About What You Flush
Don’t give roots extra ammo. Avoid flushing wipes (even the “flushable” ones), paper towels, or anything stringy. They all get caught in roots and make blockages worse.
If the Roots Are Already In
Once roots are inside the pipe, it’s a job for the pros. They might use hydro jetting to blast the roots out with high-pressure water or send in a mechanical cutter. In bad cases, they’ll reline or replace the pipe completely.
This isn’t something you want to mess around with. Trust me—waiting too long just makes the repair more expensive. My go-to when I need help is H20Pro.
This kind of thing sneaks up on you. One minute your drains are working fine, and then boom—you’ve got sewage in the basement. Don’t wait until it’s a crisis. Take a few steps now, keep an eye out for signs, and bring in a pro if anything seems off.
It’s one of those things most people don’t think about until it’s too late. Don’t be that guy.
If you’re looking for a natural way to keep pests away from your lawn, you might have heard that cayenne pepper can do the trick.
But is it really safe for your grass, or could it cause more harm than good?
In this post, I’ll go over everything you need to know about using cayenne pepper on your lawn—from how it works to how to apply it properly, plus a few precautions to keep in mind.
Can Cayenne Pepper Kill Grass?
No, cayenne pepper won’t kill your grass.
The pepper contains something called capsaicin, which makes it hot and spicy. This natural compound is great at keeping pests away, but it’s not strong enough to hurt your grass or soil.
In fact, cayenne pepper can actually be good for your lawn – it can add some nice nutrients to your soil when you use it properly.
I’ve heard from many gardeners who use it successfully to keep away small animals and bugs that would normally eat their grass and plants.
That said, don’t go overboard! Using too much cayenne pepper can stress out your lawn.
If you use a ton of it (especially if it’s concentrated) it might scorch the grass or even hinder its growth.
First things first, let’s gather our supplies. You’ll need:
Ground cayenne pepper (powdered, not whole peppers)
Water
A spoon or measuring cup for mixing
Spray bottle or garden sprayer (depending on the size of your lawn)
Dish soap (to help the pepper stick to your grass)
#1 Mix The Cayenne Pepper Solution
Grab a mixing bowl or bucket. Pour in 1 quart of water – that’s about 4 cups. Now, add 2-3 tablespoons of ground cayenne pepper.
If you’re making a bigger batch, you can scale up the amounts—just keep the ratio the same.
If you want it to stick better, toss in 1-2 teaspoons of regular dish soap. This acts as a surfactant, helping the mixture cling to grass blades and pests.
Give it a good stir until everything is dissolved.
If you prefer a dry application, you can skip the mixing. Just have your ground cayenne pepper ready to go. This method is quicker but might not spread as evenly as the liquid version.
If you went for the liquid mix, carefully pour it into your spray bottle or garden sprayer. Make sure it’s clean and free of any other chemicals.
Now, head out to your lawn. Start spraying lightly over the areas you want to protect. Focus on spots where you’ve seen pests or around the edges of your lawn where critters might enter.
Don’t saturate the grass – a light misting is all you need.
Pay attention to areas under bushes, near garden beds, or any pest hotspots you’ve noticed.
Remember, you’re not trying to drench the lawn, just leave a light coating of the spicy deterrent.
#3 Dry Application (Optional)
If you’re going the dry route, it’s sprinkle time!
Take your container of ground cayenne pepper and start walking around your lawn. Use your fingers to lightly sprinkle the pepper over the grass.
Try to maintain an even distribution, and focus on the problem areas, just like with the spraying.
But here’s a pro tip: pick a calm day for this. Cayenne pepper is super light, and even a gentle breeze can send it flying – right into your face if you’re not careful.
If it’s a bit breezy, consider wearing a dust mask to avoid any spicy sneezes!
Ok you’ve peppered your lawn, but the job’s not done yet.
Cayenne pepper is effective, but it’s not a one-and-done solution. Rain, sprinklers, and even heavy dew can wash away your peppery protection.
As a general rule, plan to reapply every 3-4 weeks.
However, keep an eye on your lawn. If you start noticing pest activity picking up again, that’s your cue to break out the cayenne.
After a heavy rainstorm, you might want to reapply sooner. Or if you know a rainstorm is coming, try to apply your cayenne pepper treatment a day or two before.
This gives it time to work its magic before getting washed away.
Some Precautions When Using Cayenne Pepper On Grass
Don’t use too much cayenne pepper. It might attract unwanted animals, and if you go overboard, it could harm your grass.
Let your neighbors know what you’re doing, especially if they have pets. The last thing you want is a curious dog walking through your cayenne-covered lawn.
And always keep an eye on how well it’s working.
If pests are still causing trouble, you might need to adjust how much cayenne pepper you’re using or think about trying something else.
Bottom Line
Cayenne pepper is a safe, natural way to control pests without killing your grass – as long as you use it right. It’s pretty good at keeping various pests and animals from messing up your lawn.
Just follow the steps we talked about, be careful, and your lawn should be just fine.
Remember, don’t go crazy with it, and it’s always a good idea to test it out on a small area first before you pepper your whole lawn.
FAQs
Cayenne Pepper For Animal Repellent?
Yes, cayenne pepper can work as a natural animal repellent! The spicy scent keeps animals like squirrels, rabbits, and deer away from your lawn or garden.
Will Cayenne Pepper Hurt Dogs?
Cayenne pepper isn’t toxic to dogs in small amounts, but it can irritate their eyes, nose, and throat if they get too close. Just be careful to use it where your dog can’t get to it.
Will Cayenne Pepper Keep Cats Away?
Yes, cayenne pepper can help keep cats away. Cats hate the smell or the spice, so it’s a good natural way to keep them out of your yard.
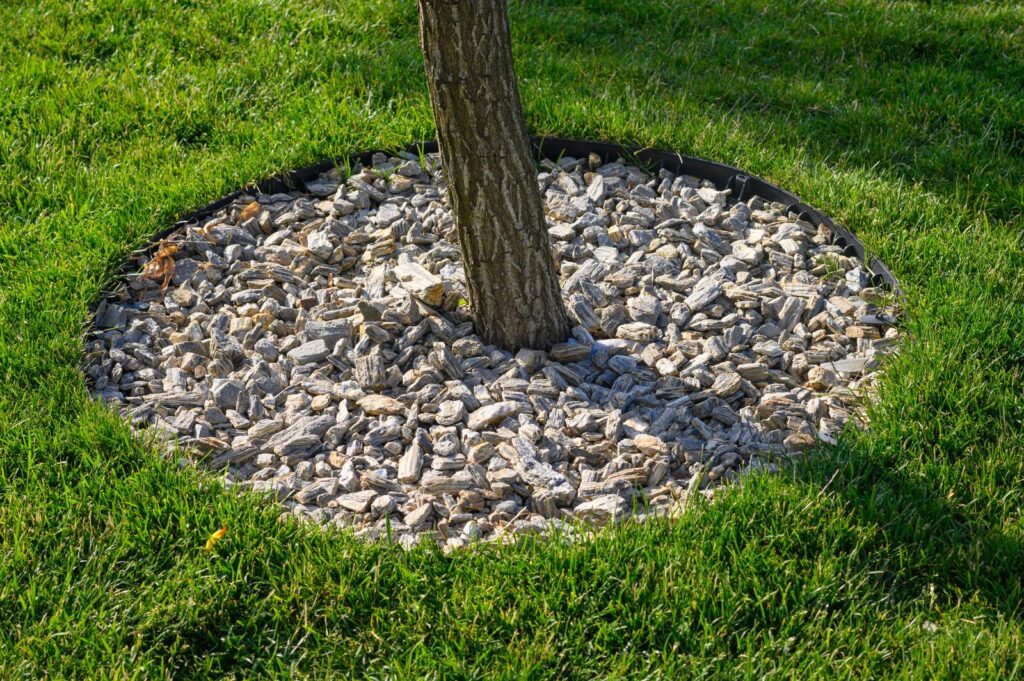
So, you’re thinking about sprucing up the area around your tree with some river rocks, right?
They do look pretty—nice, smooth stones that can make your yard look super nice.
But before you start hauling rocks, you might want to take a second to think about how they could impact your tree’s health. River rocks might seem like a low-maintenance landscaping win, they can actually cause a lot of problems for your tree over time.
In this post, I’ll go over everything you need to know about putting river rocks around trees.
Is It Ok To Put River Rocks Around Trees?
The short answer is NO. You should NOT put river rocks around trees.
River rocks might seem like a good choice because they’re pretty and low-maintenance, but they can actually harm your tree over time.
Trees need the right conditions to thrive—good soil, proper moisture, and airflow to their roots. River rocks might look nice, but they can disrupt these conditions.
Let’s go over the main reasons why you might want to think twice before putting river rocks around your trees. Each of these can really impact how well your trees grow and stay healthy:
#1 River Rocks Can Increase The Soil Temperature
One of the biggest problems with placing river rocks around trees is that they can mess with the soil temperature.
Rocks absorb heat from the sun and retain it for a long time. This is especially true during hot summer days. The heat can transfer down into the soil, creating an environment that’s too hot for the tree’s roots.
Tree roots prefer a more stable temperature, especially in summer. When the ground gets too hot, it can stress the tree and stunt its growth.
In the winter, rocks can also keep the soil too warm, preventing it from freezing when it naturally should. So, putting river rocks around trees can mess with that natural temperature balance.
Trees need water to stay healthy, but river rocks aren’t great at keeping moisture in the soil.
When it rains or when you water your trees, the water tends to flow right over the rocks instead of getting into the soil where it needs to go. This makes it harder to keep the right amount of moisture in the soil for your trees.
The smooth river rocks actually make water run off instead of soaking in.
During dry spells, you’ll probably need to water more often because the soil under the rocks dries out faster than soil that’s exposed or covered with natural mulch.
This becomes a real problem during growing seasons when trees need steady access to water.
#3 Prevents Proper Aeration And Drainage
Tree roots need air to stay healthy, but river rocks create a barrier that keeps air from getting into the soil.
The rocks can also make it harder for water to drain properly, which might lead to water pooling around the roots. Over time, this can cause the roots to rot.
The weight of all those rocks can also pack down the soil, making it even harder for air to get in and for roots to spread out naturally.
The reduced air circulation also affects the helpful microorganisms in the soil.
#4 They Can Look A Bit Fake
River rocks can make your garden look somewhat artificial.
Even though they look neat and tidy, they often don’t fit in naturally with the rest of your yard.
Gardens usually look better when everything works together naturally rather than having elements that stand out too much.
When all the rocks are the same size and color, they can look pretty different from the natural shapes and textures in your garden.
This becomes more noticeable as your garden grows and changes, and might make your landscaping look outdated compared to the rest of your naturally evolving yard.
Also Read: Will cayenne pepper kill grass
#5 Hard To Maintain
We all love a low-maintenance landscape, right?
But, unfortunately, river rocks aren’t as maintenance-free as they seem. Over time, dirt and debris can get trapped between the rocks.
Weeds might start growing too, and the rocks will need to be cleaned or rearranged regularly. Plus, as the tree grows, the rocks might start crowding the base and damaging the tree’s bark.
If you’re hoping for a super easy setup, rocks might not be the way to go.
What Can I Put Around Trees Instead Of River Rocks?
Luckily, there are better options for decorating the area around your trees! You can use materials that will protect your tree, look nice, and require less upkeep.
Here are a couple of alternatives to river rocks that your tree will appreciate:
Organic Mulch
Organic mulch (like wood chips or shredded bark) is one of the best things you can put around trees.
It helps to maintain a cool soil temperature, retains moisture, and allows air to circulate to the roots. Mulch also breaks down over time, enriching the soil with nutrients.
Plus, it’s easy to replenish as needed.
Here are some benefits of mulch:
It retains moisture better than rocks.
It decomposes naturally and adds nutrients to the soil.
It looks more natural and blends well with garden plants.
Just make sure you don’t pile it up too high against the tree trunk, as this can cause rot. Spread it out evenly around the base, keeping a little space from the trunk to allow the tree to breathe.
If you really like how stones look, gravel works better than river rocks.
It’s a bit more natural looking than river rocks, and it provides good drainage, which is super important for tree health. Gravel won’t trap moisture in the way rocks do, and it lets water seep down to the roots without holding onto it too much too.
Plus, it’s easier to maintain than river rocks since it doesn’t tend to trap as much debris.
It can give your garden a more rustic or Mediterranean feel, depending on the style you like.
However, just like river rocks, gravel can still get a bit messy, so you’ll want to keep an eye on it. Weeds can grow through gravel too, but it’s not as bad as with rocks.
Wrapping Up
If you love the look of river rocks, it’s totally understandable. They’re attractive, low-maintenance, and add a nice touch to your landscaping.
But putting river rocks around trees may not be the best choice.
Rocks can cause all sorts of problems, from raising soil temperatures to blocking proper moisture and airflow. Over time, this can lead to unhealthy trees.
Luckily, some of the options we talked about are just as nice (if not nicer!).
FAQs
Will Rocks Around A Tree Kill It?
Rocks themselves won’t directly kill a tree, but over time, they can cause enough stress that the tree’s health could decline. If the roots suffer from poor aeration, lack of moisture, or extreme temperatures, the tree may become unhealthy or even die.
It’s best to avoid rocks and go for materials that help, not hinder, the tree.
Large Rocks Around Trees
Large rocks are even more problematic because they’re harder to move and adjust. They’re also more likely to compact the soil or damage the roots as the tree grows.
Stick with something softer and more flexible, like mulch or gravel. Your tree will thank you!
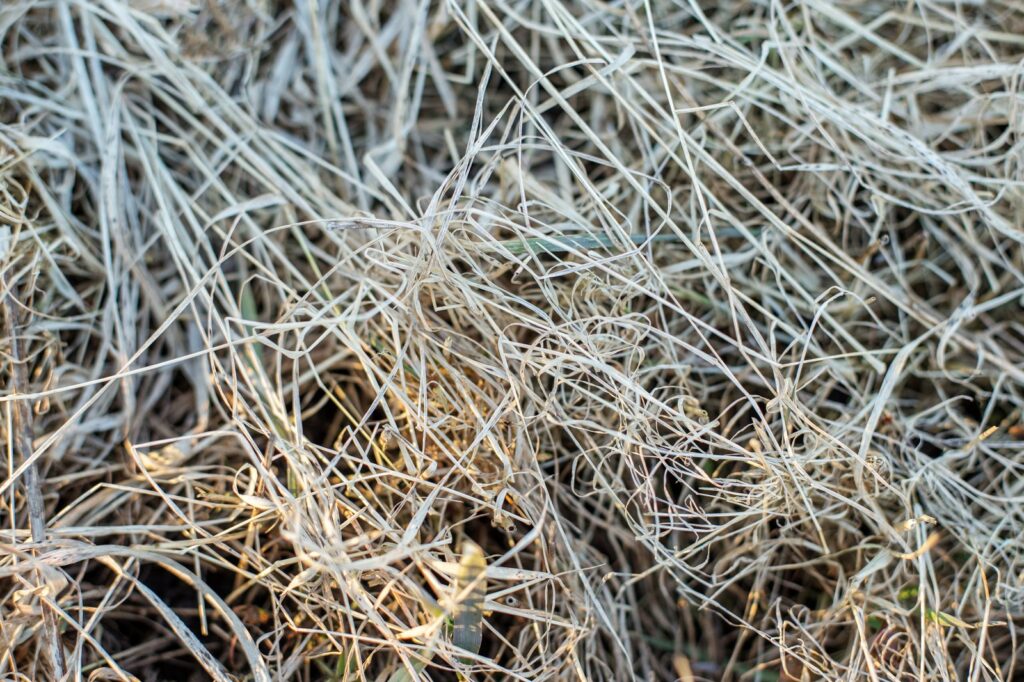
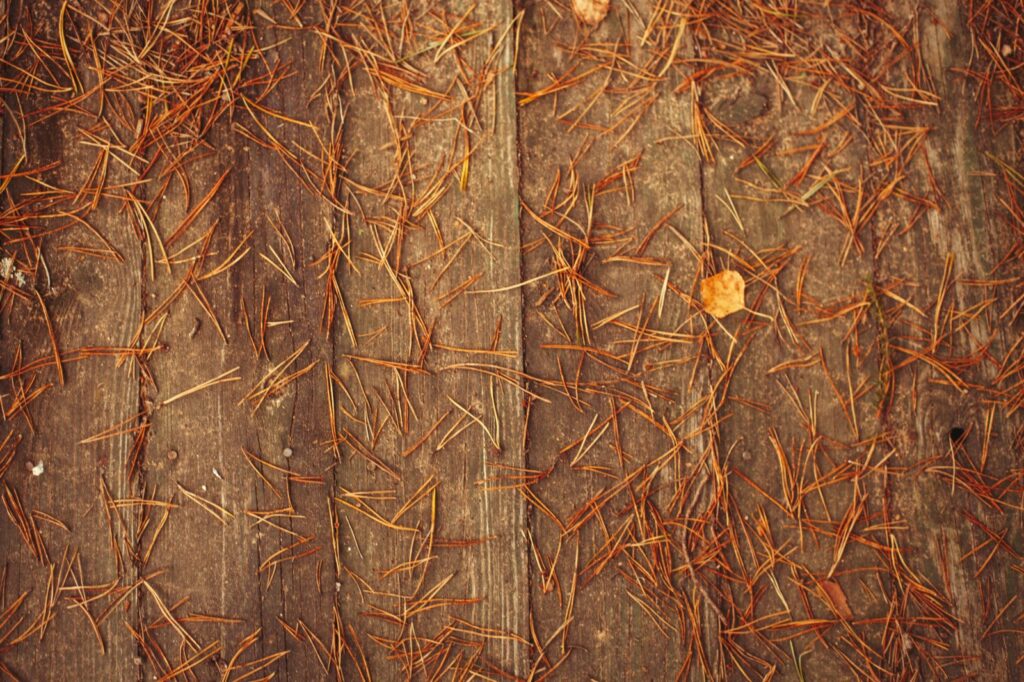
Anyone with pine trees knows what it’s like to have those needles cover their lawn.
While they might not look too concerning at first, pine needles can actually cause problems for your grass over time if you don’t take care of them.
In this post, I’ll explain how they affect grass, and if pine needles can kill grass.
How Pine Needles Affect Grass
There’s quite a bit going on when pine needles pile up on your lawn, and none of it helps your grass grow well. Let me explain:
Blocks Water And Nutrients
The biggest problem with pine needles is that they get in the way of water and nutrients trying to reach your soil.
As pine needles fall and pile up, they form a dense mat on top of the grass. This mat prevents water from penetrating the soil, meaning your grass doesn’t receive the hydration it needs.
The needles also keep air from moving around in the soil properly.
Your grass roots need that air to stay healthy! When the soil gets packed down without enough air, it’s even harder for the grass to get the nutrients it needs.
Without enough water and nutrients, your grass won’t grow well and some spots might die off.
Your grass needs sunlight to make its own food through photosynthesis.
When you’ve got a thick blanket of pine needles on your lawn, the grass underneath can’t get enough sun to do this properly. This makes the grass grow weak and unhealthy.
This is especially tough for grass growing in shady spots under pine trees where lots of needles tend to gather.
After a while, areas that don’t get enough sun start thinning out or turning into bare patches.
Competes For Moisture
Pine needles don’t just block water – they actually take some of it for themselves. As the needles break down, they pull moisture away from the grass.
This becomes a real problem during dry spells when there isn’t much water to go around.
Your grass needs the moisture in the soil to stay healthy, but that thick layer of pine needles keeps taking what little water there is.
If the soil is already dry, having pine needles on top just makes things worse for your grass.
Lowers Soil’s pH
Pine needles are naturally acidic, and over time they can make your soil more acidic too.
Most grass likes neutral soil (with a pH around 6 to 7), so when things get too acidic, the grass has trouble getting the nutrients it needs. The acid levels can also hurt the good bacteria and other tiny organisms in your soil that help keep your lawn healthy.
As the soil gets more acidic, some types of grass just can’t grow well there anymore, and in really bad cases, they might die off.
Pine needles won’t kill your grass overnight, but they can definitely hurt it over time, and yes, sometimes they can end up killing it.
If you let pine needles pile up for too long, they create conditions that make it really hard for grass to survive. When grass is going to have a very tough time.
The grass under thick piles of needles, especially in shady areas, might not even make it.
But here’s the good news – if you clean up those pine needles regularly and take care of your lawn, your grass should be fine.
How To Remove Pine Needles From Lawn
The best way to keep pine needles from damaging your lawn is to clean them up regularly.
There are several ways to do this, and each one works better in different situations, depending on how many needles you’re dealing with and how big your yard is.
Let me explain:
1. Raking
Raking is probably the most common way to get rid of pine needles.
You’ll want a leaf rake, and there are even special ones made just for pine needles – they have flexible tines that pick up the needles without hurting your grass.
It’s best to rake regularly, especially in fall when pine trees drop most of their needles. And try to rake when the needles are dry – wet needles just stick together and make the job harder.
Sure, raking takes some work, but it’s a great way to make sure your grass can get the sunlight and water it needs.
2. Using A Lawn Sweeper
If you’ve got a big yard or lots of pine needles, a lawn sweeper can make your life easier.
These machines have brushes that spin around and sweep pine needles and other stuff into a collection bin. You can get ones you push or ones you can pull behind a riding mower.
They are great for cleaning up big areas quickly, and they’re not as hard on your back as raking.
Plus, they’ll pick up leaves and other yard debris too, so they’re pretty handy to have around.
A leaf blower or vacuum can work well for dealing with pine needles.
Leaf blowers are great for pushing the needles into piles, and they can reach spots that might be tricky to get to with a rake, like along fences. If you go with a vacuum, some of them come with bags to collect the needles and other yard waste.
Blowers work best in open areas, while vacuums are good for smaller spaces.
Just be careful not to blast the air too hard at your grass – you don’t want to damage it.
4. Mowing Over Pine Needles
Sometimes you can just mow over pine needles to break them up.
If you don’t have too many needles on the ground, a mulching mower can chop them into tiny pieces. These pieces will eventually break down and add some good stuff to your soil.
But this only works if the layer of needles isn’t too thick or wet – otherwise, you might clog up your mower or the needles won’t break.
This method works best when your lawn is healthy and you’re not dealing with too many needles.
5. Hand Picking Or Using A Rake With A Bag Attachment
For small areas or spots with just a few pine needles, you might want to pick them up by hand or use a rake with a bag attached.
This gives you more control and works well for those tough-to-reach places where bigger equipment just won’t fit.
Hand picking is also good for cleaning up around flower beds or garden paths.
A rake with a bag makes it easy to collect and get rid of them without making a mess.
What to Do With Dead Pine Needles
Once you’ve cleaned up all those pine needles, you might wonder what to do with them. They’re pretty acidic, so they don’t work in every compost pile, but you can still use them in other ways.
One option is to spread them around as mulch in your garden.
Put a thin layer around your plants, flowers, or trees – they’ll help keep moisture in the soil, stop weeds from growing, and even provide some protection when it gets cold.
You can add them to your compost pile too, just make sure to mix them with other stuff like grass clippings or leaves to balance out the acid.
If you don’t want to use them for anything, you can always put them in yard waste bags or take them to a place that recycles yard waste.
Bottom Line
Pine needles won’t kill your grass right away, but they can cause damage if you let them pile up.
They block water, cut off sunlight, and make the soil too acidic – and all of that can eventually kill your grass if it gets bad enough.
The best thing you can do is to get rid of those pine needles regularly.
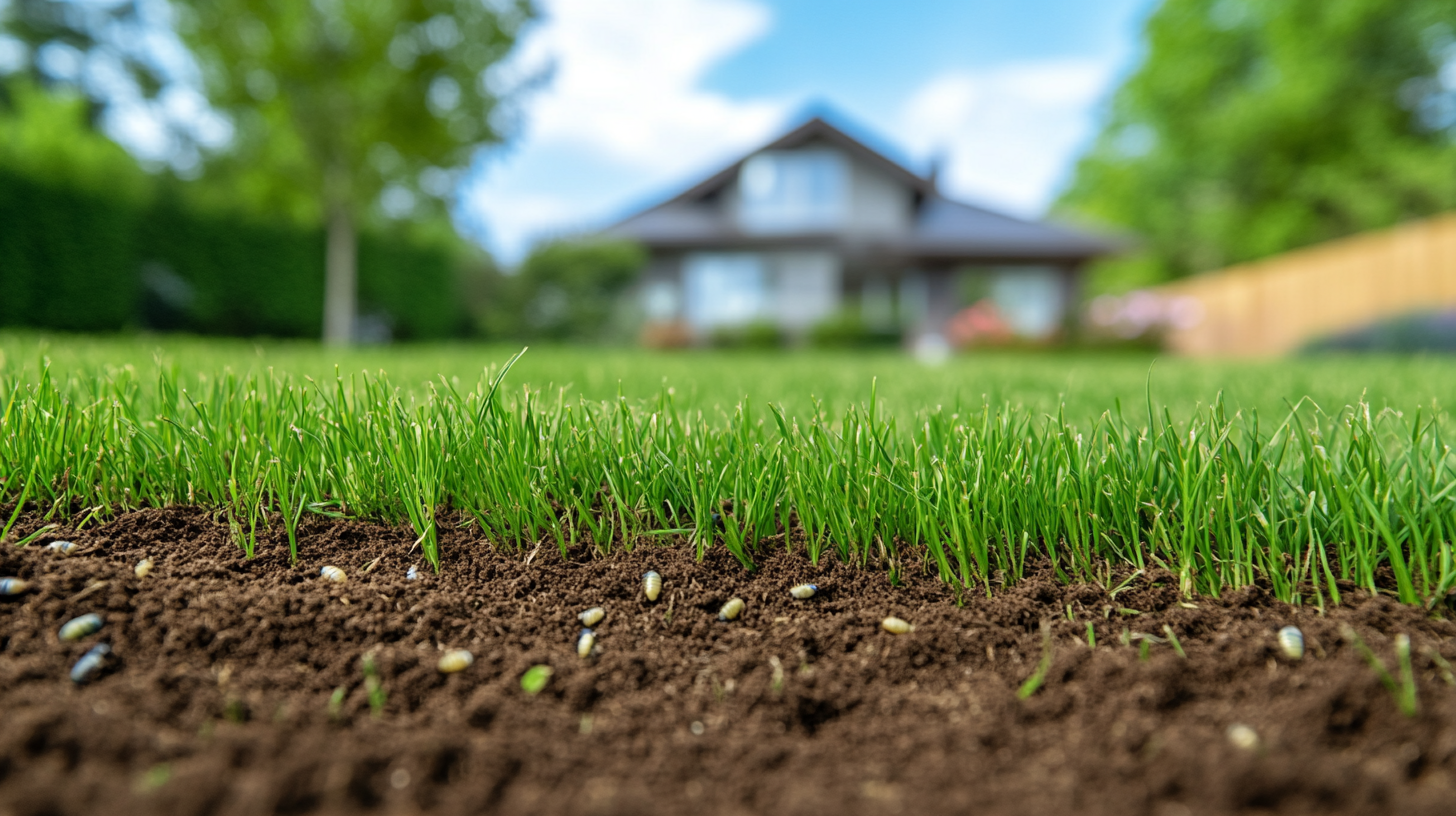
If you’re asking this question, you’ve probably missed the ideal time to act.
But don’t panic just yet! Late-season treatments might not be as effective as catching grubs earlier, but you still have options to minimize the damage.
In this post, I’ll explain whether it’s too late to treat for grubs and what you can do if you’re past the prime treatment window.
I’ll cover late-season treatment options, their effectiveness, and steps to take for better grub control in the future.
Best Time To Treat For Grubs
The best time for grub control is usually from late spring to early summer (April to July).
This is when the adult beetles are laying eggs, and the baby grubs are just hatching and starting to eat your grass roots.
If you can get your preventative treatments down during this time, you’ll have a much better chance of keeping the grub population under control before they can do much damage.
Grubs are most vulnerable when they’re small and actively feeding, so treatments are much more effective.
If you’re asking this question, you’ve probably missed the peak treatment window.
But don’t worry—it might not be too late to treat grubs, depending on the time of year and how bad the infestation is.
Time Of The Year
If it’s late fall, the grubs may have already burrowed deeper into the soil as they prepare for winter, making them harder to reach with traditional treatments.
But applying insecticides at this time might still kill a few of the stragglers near the surface.
It’s not going to be nearly as effective as treating earlier when they were younger and closer to the roots.
Severity Of The Infestation
If you’re only seeing a few damaged patches in your lawn, it might be okay to hold off until next year and apply preventative treatments in early summer.
However, if your lawn looks like it’s been hit hard, taking action now, even late in the season, can at least help reduce the grub population.
That way, they won’t cause even more damage before winter hits.
Plus, you’ll have fewer adult beetles to deal with next year.
Late Season Treatment Options
If you’ve missed the early treatment window, there are still some options for grub control.
There are some insecticides that can be used in cooler weather when grubs are more likely to be deeper in the soil.
One of the best-known options for late-season treatment is a product containing trichlorfon, which can kill larger, more mature grubs. It works fast but has a shorter residual effect, meaning it doesn’t last as long in the soil, so it’s best to apply it when you know grubs are still active.
Another option is to use carbaryl or chlorantraniliprole, which are also effective for late-stage grubs but might take a little longer to show results.
Some common options include:
Bayer Advanced 24-Hour Grub Killer Plus
Sevin
That said, these late-season treatments might not work as well as the early preventative ones.
Some researchers at Michigan State University found that treatments applied in September or October might only kill 20-80% of grubs, compared to the better results you get with spring treatments.
So these treatments will not completely eradicate the problem, it can help reduce the population and limit further damage.
Preventing Grubs For Next Year
If you’ve been battling grubs this year, or if you just want to avoid dealing with them in the future, it’s never too early to start thinking about next season.
Here are some ideas to keep in mind:
Put a reminder on your calendar for early spring grub prevention. Try to get that preventative treatment down in April or May, before the adult beetles start laying eggs.
Keep your lawn healthy. A lawn with deep roots can handle grub damage better.
Encourage natural predators. Birds and certain types of worms (called beneficial nematodes) eat grubs, so it’s good to have them around.
Keep an eye on your lawn. The sooner you notice grubs, the easier it is to deal with.
Change your treatments if you’re treating for grubs every year to prevent the grubs from becoming resistant to pesticides.
Spring is the best time for treating grubs, but don’t give up if you’re dealing with a problem later in the season.
Late-season treatments can still help, especially if you start as soon as you notice damage.
But if you really want to stay on top of grub control, focus on prevention and early treatment in the coming years. That’s your best bet for keeping your lawn grub-free and looking good.
FAQs
Will Grass Grow Back After Treating For Grubs?
Yes, grass can grow back after treating for grubs, but it depends on the extent of the damage. If only small patches of your lawn are affected, the grass may recover on its own with proper watering and care.
Is It Too Late To Treat For Grubs In The Winter?
Yes, it’s too late to treat for grubs in the winter. By this time, the grubs have burrowed deep into the soil to hibernate, making them almost impossible to reach with insecticides. It’s best to wait until late summer or early fall next year
Is It Too Late To Treat For Grubs In The Summertime?
In early summer, it’s generally too soon to treat grubs, as they haven’t hatched yet. However, if you’re in late summer, this is the perfect time to treat them.
It’s a fair question, especially when you’re putting in all that effort to get your lawn looking great.
Seeding a lawn isn’t exactly a walk in the park, and the last thing you want is to accidentally mess it up with something like lime.
Don’t worry, though – lime won’t kill new grass seed!
In this post, I’ll go over why lime won’t kill new grass seed, and go over potential risks of your using lime and the best practices for using it.
Lime Won’t Kill New Grass Seed
Let’s cut to the chase: lime isn’t going to kill your new grass seed. In fact, when you use it right, lime can actually help create a better home for your grass to grow in.
Lime’s main job is to adjust your soil’s pH and make it less acidic.
This happens slowly, so it doesn’t mess with your seeds sprouting.
Many types of grass actually like soil that’s a bit on the alkaline side, so lime could end up being your lawn’s new best friend.
How Lime Effects On Your Lawn
Lime is basically ground-up limestone rock. It’s got calcium carbonate in it, and sometimes magnesium carbonate too.
When you put it on your soil, it works to make it less acidic over time.
This pH change can be great for your lawn because it affects how your grass gets nutrients and how healthy the soil is overall.
Just remember, lime isn’t like a magic wand. It takes its sweet time to work – we’re talking weeks or even months. This slow-and-steady approach is actually good news for your new grass seed.
It means your seeds won’t suddenly find themselves in a totally different environment.
Potential Risks Of Applying Lime With New Grass Seed
While lime generally plays nice with new grass seed, there are a couple of things to keep in mind if you’re thinking about using them together.
Knowing about these potential hiccups can help you avoid any issues and get the best results:
#1 pH Fluctuations
One thing to think about is that putting lime down at the same time as your seeds might cause some small, temporary pH changes right at the soil surface.
This could potentially stress out your baby grass as it’s coming up, but it probably won’t stop your seeds from sprouting altogether.
These little pH changes happen because the lime starts reacting with the soil right away, even though you won’t see the full effects for a while.
It’s not likely to cause major problems, but it’s something to be aware of.
#2 Interfere With Seed-To-Soil Contact
Another thing to consider is how you’re putting the lime down.
If you go overboard in some areas or spread it unevenly, you might end up with patches where the seeds don’t make good contact with the soil.
This seed-to-soil contact is super for successful germination.
Seeds need to be in direct contact with moist soil to absorb water and begin the germination.
A thick layer of lime between the seed and soil can interfere with this contact. If there’s too much lime in the way, you might end up with patches where the grass doesn’t grow as well.
Best Practices For Using Lime When Seeding
So, how do you use lime without messing up your grass seeds?
Ideally, you’d put lime down a few months before you plant your seeds. This gives it time to start working on the soil pH.
But if you can’t do that, it’s usually okay to put lime down when you’re seeding or soon after.
If you’re putting lime down with new seed, try to spread it evenly and don’t overdo it. A good rule to follow is using no more than 50 pounds for every 1,000 square feet of lawn in one go.
If you need more based on your soil test, you can always add more later.
Using a spreader is a good idea, and you might want to go over the area twice in different directions to make sure it’s even.
After you’ve put the lime down, rake the soil lightly to mix it in and create a nice bed for your seeds.
Factors That Influence Lime’s Impact On Seeds
A few different things can affect how lime interacts with your new grass seed.
Understanding this can help you make better choices about when and how to use lime:.
Current Soil pH Levels
The pH of your soil right now is super important.
If your soil already has the right pH for grass (usually between 6.0 and 7.0), you might not need to add lime at all. Always start with a soil test before you put any lime down.
This will tell you exactly how much lime your soil needs, if any.
Type Of Lime Used (Fast-Acting Vs. Regular)
The kind of lime you use can make a difference too.
Fast-acting lime products might change the pH more quickly, which could potentially stress your new grass more than regular lime.
Regular lime works more slowly and might be a safer bet when you’re also planting seeds.
Grass Species Being Planted
Don’t forget about the type of grass you’re planting!
Different types of grass like different soil conditions, so it’s good to know what kind of grass you’re working with.
Plus, some types of grass are more easygoing about pH changes than others, which can affect how they respond to lime.
Alternatives And Considerations
If you’re still nervous about using lime when you seed, you’ve got options. These alternatives can help you improve your soil without risking your new grass seed:
Wait A Few Weeks
One option is to hold off on the lime until your new grass has had a chance to get established.
This usually means waiting about 4-6 weeks after you’ve planted your seeds.
By then, your grass will have stronger roots and will be better equipped to handle soil changes.
Testing Soil Before Liming
Before you put any lime down, it’s really important to test your soil.
This will give you the lowdown on your soil’s current pH and nutrient levels, so you can make smart decisions about whether to use lime and how much.
A soil test can also help you avoid using too much lime, which could throw off the nutrient balance in your soil.
Other Soil Amendments To Consider
Depending on your soil test, you might find that your lawn needs something other than lime.
For example, if your soil is low on certain nutrients, you might need to focus on fertilizer instead of changing the pH.
Always base your decisions on what your specific lawn needs.
Bottom Line
So, there you have it! Lime won’t kill your new grass seed if you use it correctly.
Sure, there are a few things to keep in mind, but the benefits of getting your soil in tip-top shape usually outweigh the small risks.
Just remember to test your soil, use the right amount of lime, and think about when you’re applying it. If you do all that, you’ll be well on your way to having a lawn that’ll make your neighbors green with envy.
Generally speaking, if you’re putting more than 50 pounds of lime on every 1,000 square feet of lawn in one go, that’s probably too much.
Overdoing it like that can be a bit of a shock to your lawn and cause some issues.
What Happens When You Over-Lime?
Putting too much lime on lawns can cause a bunch of problems.
It can push the soil pH above 7.5, making it too alkaline, and when that happens, your grass can’t easily get some important nutrients like iron, manganese, copper, and zinc.
This can lead to your grass turning yellow and not growing as well as it should.
But that’s not all. The helpful little microorganisms in your soil start to slow down, which means organic matter doesn’t break down as quickly. Your soil structure can get worse over time.
Oh, and you might start seeing more weeds popping up too.
All of this can really take a toll on your lawn, making it weaker and not looking its best.
Signs Of Too Much Lime On Lawn
Want to know if you’ve gone overboard with the lime? Here are some things to look out for:
Your grass might have yellow patches or just look yellow all over
The grass isn’t growing as fast or as tall as it usually does
You’re seeing more weeds, especially types like sedges and spurges
If you’re noticing these things, there’s a good chance you’ve put too much lime on your lawn.
But for the most accurate results, consider sending a sample to a professional lab or your local agricultural extension office. They’ll provide you with a detailed report showing your soil’s pH level and nutrient content.
If you’ve overdone it with the lime, you’ll likely see a pH above 7.0.
#2 Add Organic Matter
Now it’s time to balance things out with some organic matter.
This stuff is great for your soil – it helps bring the pH down gradually and improves overall soil health. You can use compost, well-rotted manure, peat moss, or leaf mold – they’re all great.
Spread it over your lawn about half an inch thick. If you can work it into the top few inches of soil, that’s great! If not, don’t worry – it’ll mix in naturally over time.
This organic goodness will help your soil retain water better and make nutrients more available to your grass.
#3 Apply Sulfur
If your pH is super high, you might need to use sulfur.
It’s very effective at lowering pH, but you need to be careful with it.
You can use elemental sulfur or aluminum sulfate, but many people prefer elemental sulfur because it works more slowly and gently.
Typically, you’ll need about 1-2 pounds for every 100 square feet, but don’t just guess at it. Check your soil test results and follow the package instructions carefully.
If you’re unsure, it’s worth talking to a lawn care professional before applying sulfur.
Now comes the hardest part – waiting. I know you want your lawn fixed quickly, but your grass needs time to adjust to all these changes.
While you’re waiting, keep an eye on your lawn’s health. Water it deeply but less frequently – this encourages your grass to grow deep roots, which is exactly what you want.
If possible, try to minimize foot traffic on the lawn for a while too..
Give it at least 3-4 weeks before you start evaluating the results. Sometimes, it might even take a full growing season to see real improvements.
#5 Avoid Adding Too Much Lime Again
Ok, now that we’ve sorted out this mess, let’s make sure it doesn’t happen again.
Always base lime application on soil test results
Apply lime in smaller, split applications rather than all at once
Mark your calendar for regular soil tests (every 1-2 years)
Keep good records of when and how much lime you’ve applied
Wrapping Up
Dealing with too much lime on your lawn might seem daunting, but it’s a fixable problem.
Follow the steps I outlined and your lawn should recover.
And while your lawn recovers, adjust your care routine and give it time to bounce back.
Most importantly, learn from this experience – always base future lime applications on soil test results and apply in smaller, controlled amounts.
FAQs
How Fast Does Lime Kill Grass?
Lime does not kill grass directly. Instead, it raises the soil’s pH which can make it harder for some types of grass to grow.
This might cause the grass to grow more slowly, turn yellow, or even die. But this process is slow and can take weeks or months to see any changes.
Will Lime Kill Ticks?
No, lime won’t kill ticks. Even though lime changes the pH level of the soil and might affect the environment where ticks live, it isn’t toxic to them.
Maintaining a lush, weed-free lawn is the dream for many homeowners, but sometimes those pesky invaders like clover just seem unstoppable.
If you’re battling a clover takeover, you might be wondering if Crossbow could be the solution.
The short answer is yes. Crossbow can kill clover.
In this post, I’ll go over everything you need to know about using Crossbow to kill clover.
Will Crossbow Kill Clover?
Yes, Crossbow can kill the clover in your lawn. It can kill both white and sweet clover.
The active ingredients in Crossbow, 2,4-D and triclopyr are super effective at eliminating broadleaf weeds like clover.
Here’s how it works – these chemicals target the growth and development processes of the clover plants and basically cause the leaves, stems, and roots to shut down.
You’ll start seeing the clover turn yellow and wither away within weeks.
The great thing is that Crossbow is formulated to be selective – it’ll wipe out the clover without harming your regular grass types like fescue or bluegrass.
But I would recommend testing it on a small area first.
Crossbow is not designed for home lawns, but it should be ok as long as you mix it properly.
So using the right concentration and applicati
on method is a MUST for getting the best results without accidentally damaging your grass.
How Fast Does Crossbow Kill Clover?
The speed at which Crossbow works to kill clover can vary quite a bit.
But generally, you’ll see the clover declining within about 1 – 2 weeks after applying Crossbow.
But it may take several more weeks for the clover to be completely gone, as the herbicide needs time to work its way through the plant’s roots and fully shut down its growth.
It depends on things like the size and maturity of the clover plants, the weather, and how much of the product you use.
Let me give you a quick rundown of how to apply the Crossbow too:
Before you start, you’ll want to make sure you’ve got the right equipment ready to go.
You can use either a backpack sprayer or a pump-style hand sprayer – just make sure everything is clean and in good working order.
Step 01
First up, you need to mix up the Crossbow according to the label instructions.
This is super important, because using the wrong concentration can cause problems. The typical mixture is around 4-6 ounces of Crossbow per 3 gallons of water.
Give it a good stir to get everything blended together nicely.
Step 02
Before you start spraying, take a minute to mark off any areas you want to avoid, like flower beds or vegetable gardens. You don’t want to accidentally hit plants you want to keep.
Now it’s time to start spraying!
Go slowly and make sure you’re getting even coverage on the clover plants.
Hold the sprayer nozzle about a foot away and sweep it back and forth to hit all the leaves and stems. Don’t worry about a little runoff or drips – that’s normal.
Also Read: Will lime kill new grass seed?
Step 03
After you’re done spraying, be patient and let the Crossbow do its thing.
Like I said, it’s going to take 1-2 weeks before you really start seeing the clover start to die off.
During this time, try to avoid mowing the lawn or walking on the treated areas.
If you’ve got a really stubborn clover problem, you may need to do a second application 2-3 weeks after the first one to make sure it’s completely gone.
But other than that, just follow the label instructions, and you should be good to go!
Crossbow Alternatives To Kill Clover
Crossbow is good at controlling clover, it’s not your only option.
There are a few other herbicides out there that can also do the job, and they might be a little gentler on your lawn:
Trimec
Dicamba
MCPA
All three of these are selective herbicides that are super effective against clover and other broadleaf weeds without harming your grass.
MCPA is a bit more selective than the others.
So it is a good alternative if you’re worried about potential grass damage.
Bottom Line
At the end of the day, Crossbow will kill clover.
However, you do need to be really careful about mixing concentrations, and how you apply it. Follow the directions to the letter, and avoid over-applying or spraying more than necessary.
Spot-treating problem areas is usually better than trying to cover the whole lawn.
If you’re not comfortable with Crossbow or want to try a gentler alternative like Dicamba.
FAQs
Is Crossbow Safe For Pets?
Crossbow is generally safe for pets as long as you keep the pets off the treated areas until the herbicide has fully dried and been absorbed by the plants.
Your pet would have to ingest a lot of Crossbow for it to be toxic.
Is Crossbow Safe For Lawns?
Crossbow is made for farms and NOT for lawns and turf. But for the most part, yes, Crossbow can be safe to use on your lawn, even with common grass types like fescue and bluegrass.
As long as you use it properly, Crossbow and your lawn should get along just fine.
Are you a pet owner who’s been eyeing that bottle of GrubEx, wondering if it’s safe to use around your furry friends? You’re not alone!
Everyone of us wants a beautiful, grub-free lawn without putting our beloved pets at risk.
GrubEx is not safe for pets immediately after you apply it. But it’s pretty safe after a day or two.
In this post, I’ll shed some light on why it’s not safe for pets, what happens if your cat or dog ingests it, and how to keep them away from it in the first place.
Is GrubEx Safe For Pets?
No, GrubEx is not safe for pets right after you applied it.
GrubEx contains something called trichlorfon, which is an organophosphate.
Now, I know that sounds like a mouthful, but basically, it’s the stuff that does the heavy lifting when it comes to dealing with grubs, and it can be toxic to pets.
You should keep your pets off the treated areas for at least 24 hours after you’ve applied GrubEx.
You need to water it a lot and give it time to dry properly. This reduces the chances of your pet coming into direct contact with it.
What Happens If My Pet Ingests GrubEx?
Okay, let’s talk about a scenario we hope never happens, but it’s important to be prepared.
What if your pet manages to get a mouthful of GrubEx?
First things first, don’t panic, but do take it seriously.
Like I said, the chemicals in GrubEx can be toxic to both cats and dogs if they eat enough of it.
You might see them throwing up, having diarrhea, looking really tired, or not wanting to eat. In worse cases, they might shake or even have seizures.
But remember, they’d need to eat quite a bit of it to get that sick – these symptoms will only show up then. It’s not like they’ll get sick from just sniffing around a treated lawn.
If you think your pet’s been munching on GrubEx, give your vet a call right away.
They’ll know what to do, whether it’s making your pet vomit or giving them some other treatment.
How To Keep Pets Safe After Using GrubEx
Now that we know the potential risks, let’s talk about how we can keep our furry friends safe after we’ve used GrubEx:
Fencing Or Caging Treated Areas
Setting up some kind of physical barrier will keep the pets away from treated areas.
It doesn’t need to be pretty or anything, but some temporary fencing or even portable pet playpens should do.
This is especially important in the first 24 hours after you’ve applied GrubEx.
That’s when it’s at its most potent, just sitting there on the grass.
A physical barrier is the best way to make sure your curious cat or dog doesn’t decide to investigate the new smell on the lawn.
Your pets might give you the sad eyes for keeping them out, but trust me, it’s for their own good.
If fencing off parts of your yard sounds like too much work (or your pets are expert escape artists), you can keep them on leash.
I know, I know, your dog probably loves to run free in the yard.
But think of this as a temporary measure to keep them safe.
When you take your pet out, keep them on a leash. You can make sure they stick to the safe zones and don’t wander off into any treated areas.
Plus, it’s a great opportunity for some one-on-one time with your furry friend.
Who knows, maybe you’ll discover a new favorite spot in the yard together!
Is GrubEx Safe After It’s Dried?
Once GrubEx has dried up and soaked into the ground, it’s usually safe for pets.
The drying process helps the product sink into the soil where the grubs are, which means there’s less chance of your pet coming into direct contact with it.
But, and this is a big but, it doesn’t mean you should let your guard down completely.
It’s still a good idea to keep an eye on your pets when they’re romping around in treated areas, especially in the first few days after application.
Also Read: Will lime kill new grass seed?
Try to discourage any digging or grass-eating behavior.
You know how some dogs love to chomp on grass or dig holes? Yeah, maybe redirect that energy to a game of fetch instead, just for a little while.
Alternatives to GrubEx for Pet Owners
Now, I get it. Even with all these precautions, some of you might still be feeling a bit uneasy about using GrubEx. Don’t worry, you’re not out of options!
There are some alternatives out there without bringing chemicals into the mix.
First up, we’ve got some organic options.
Things like nematodes or milky spore might sound like something out of a sci-fi movie, but they’re actually natural predators that target grubs specifically.
The best part? They’re generally safe for pets, so you can let your furry friends roam free.
Another route you could take is calling in the professionals.
Pest control experts can assess your specific situation and recommend treatments that’ll keep both your lawn and your pets happy.
Plus, they often have access to more targeted products that are safe for your pets.
Bottom Line
At the end of the day, GrubEx is not safe for pets.
But you can use GrubEx and still keep your pets safe. It’s all about following the instructions, keeping your pets away from treated areas for a bit, and using some common sense.
And if you’re still worried, there’s no shame in trying out some alternatives or asking a pro for help. Your pets will thank you for being so thoughtful!